This blog post is part of my AZ-104 series where this time round we will be taking a deep dive into Azure Resource Groups. The following Exam objectives are covered in this post:
Manage Subscriptions and Governance:
Manage Resource Groups
Apply and Manage Tags on Resources
What are Resource Groups? Resource Groups are the foundational building blocks of Azure, you can think of Resource Groups as logical containers within a Subscription that hold all your created Azure resources within them.
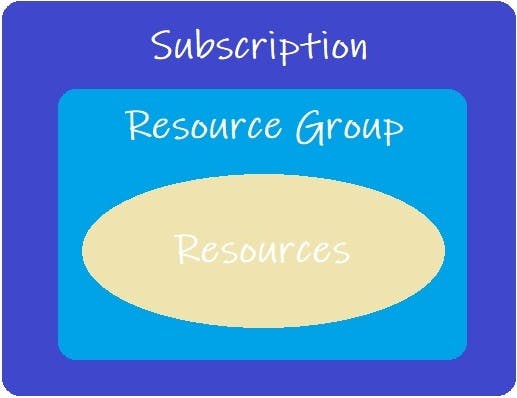
The following are key points to know when talking about Resource Groups:
- Resource Groups must exist within a Subscription
- All resources must exist in a Resource Group and only one.
- Resource Groups cannot be nested.
- You can move most resources between resource groups in the same subscription.
You can use Resource Groups to help structure your resources in a number of ways:
- Departmental
- Billing Purposes
- Resource functions (E.g All VM's in a Resource Group)
- To group All resources used for an app or function
- Authorization - Applying Role Based Access Control (RBAC) to resources
Managing Resource Groups
You can create and manage Resource Groups in a number of ways:
- Azure Portal
- Azure CLI
- PowerShell
- Azure Resource Manager (ARM) Templates. (Will cover this in a separate post)
Azure Portal
Creating a Resource Group
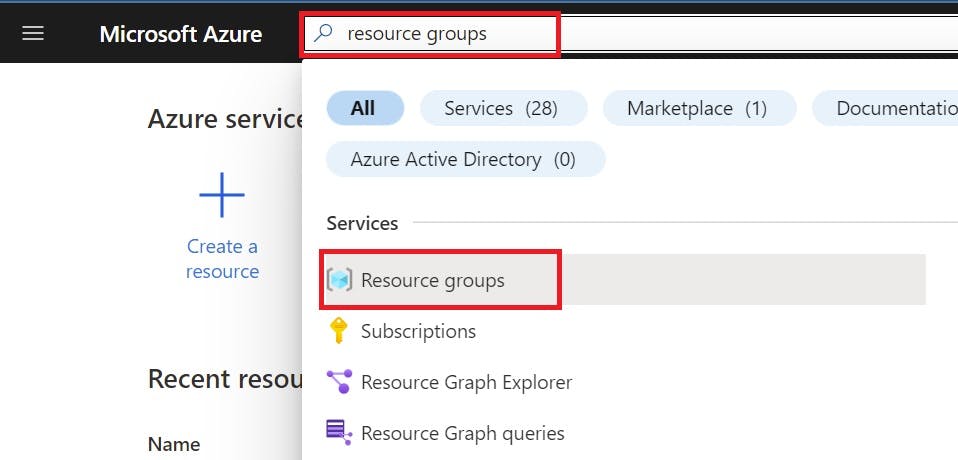
Navigate to portal.azure.com and search for "Resource Groups" in the search bar, then select Resource Groups under Services:
Click on "Create" and provide the following:
- Subscription to place the Resource Group in (If you have multiple)
- Name
- Region
- Add tags (Optional)
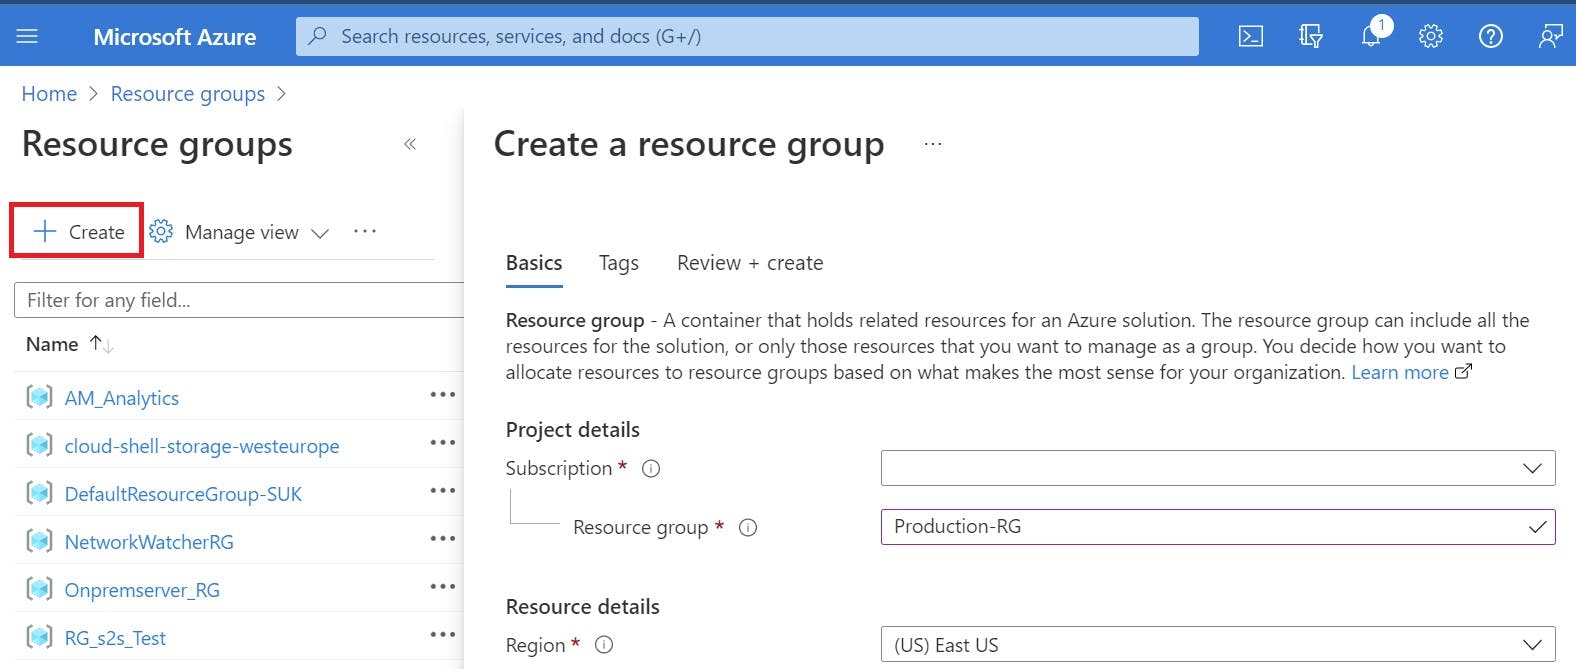
Then select review and create. If all criteria is accepted your resource group will appear in the resource group screen.
Deleting a Resource Group
To delete a Resource Group simply select your Resource Group from the Resource Group screen. Once loaded select "Delete Resource Group"
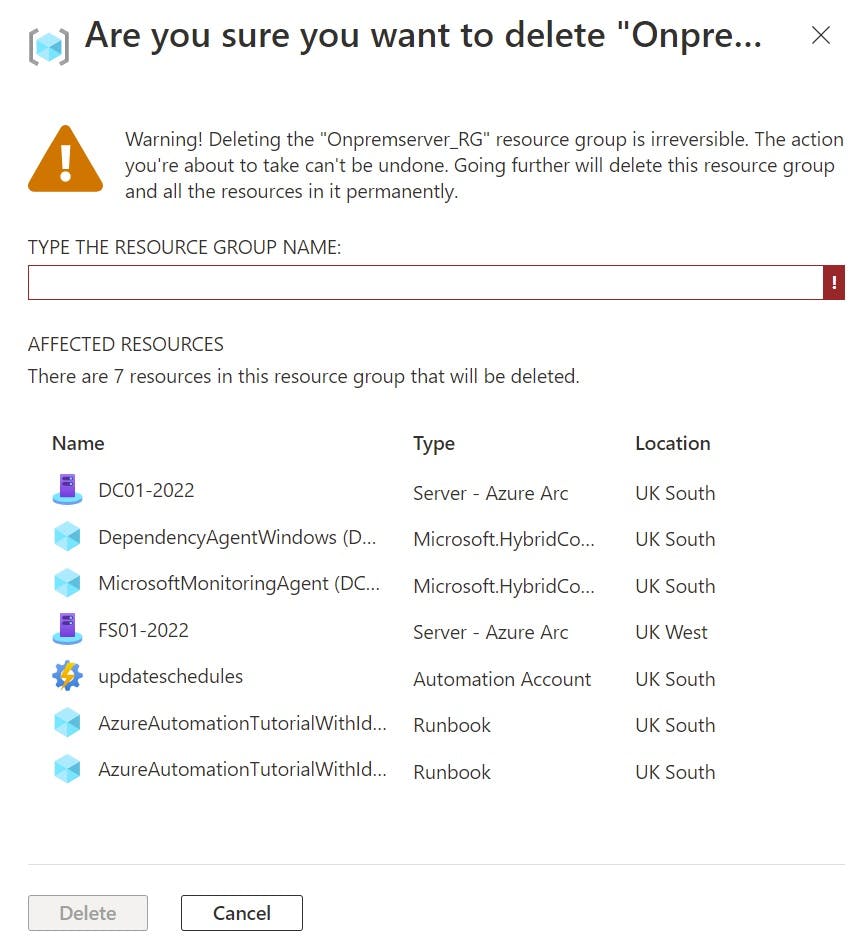
Warning - When deleting a Resource Group take care as this will delete ALL resources within the Resource Group for good!

You will be Warned that deleting the resource group will delete everything within itself and no way to return once committed! so be warned! You will be asked to enter the resource group name as confirmation of deletion.
Azure CLI
To access the Azure CLI the button is located on the top navigation bar of the Azure Portal . On first access you will need to create a storage account the CLI will guide you through doing this.

Below are a number of Azure CLI examples for managing Resource Groups
Create a Azure Resource Group
az group create --name Production-RG --location westusDelete a Azure Resource Group
az group delete --name Production-RGWarning - When deleting a Resource Group take care as this will delete ALL resources within the Resource Group for good!
List All Resource Groups
az group listPowerShell
You can use the same CLI to execute PowerShell commands
Below are a number of Powershell commandlets for managing Resource Groups
Create a Azure Resource Group
New-AzResourceGroup -Name 'Production-RG' -Location 'West US'Delete a Azure resource Group
Remove-AzResourceGroup -Name 'Production-RG'Warning - When deleting a Resource Group take care as this will delete ALL resources within the Resource Group for good!
List all Azure Resource Groups
Get-AzResourceGroupTags
Tags can be used to categorize resources. For example you could add a "Department: Sales" tag to all resources that Sales use. This could also come in handy for departmental billing as you can search by tags to get the overall costs that a department uses across all it's resources.
You can apply tags in all methods mentioned above, the below example shows the Azure Portal, when creating a Resource group select the "Tags" tab:
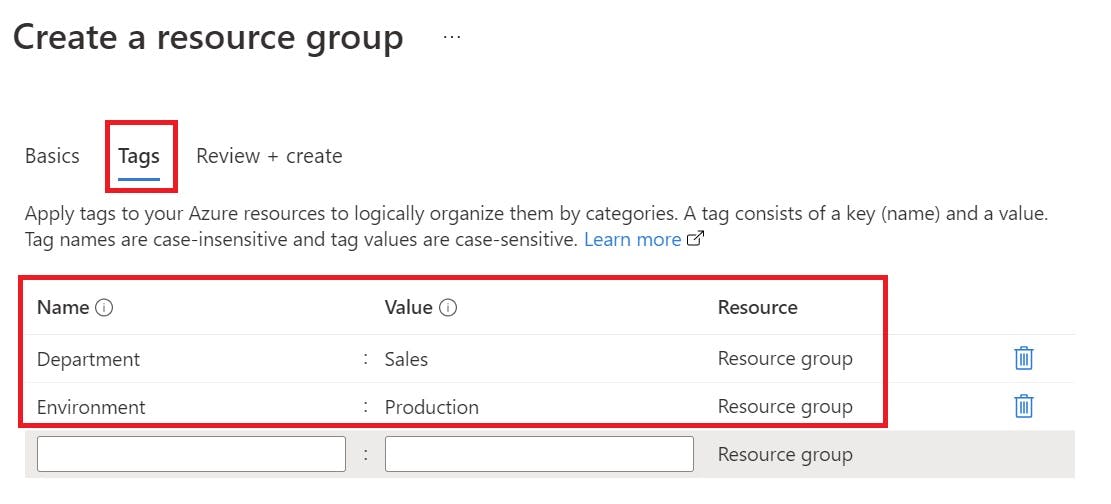
You can set tags at Subscription, Resource Group and Resources Levels
EXAM TIP
Tags are not inherited! If you set a tag at Resource Group level all the resources within that Resource Group will not inherit the tags. You need to tag them all manually or in bulk at the Resource level.
For more information on tagging see Microsoft Documentation:
