Introduction
The past week I have been working on a Hyper-V to Hyper-V migration. One of the quickest ways to migrate your virtual machines is by Exporting the VM on your current host box then importing the machine on the new host.
While this is simple, I got caught out by a number of machines with enabled Trusted Platform Modules essentially making the VM a "Shielded Virtual Machine" and thought this would make an ideal blog post.
The problem was when the VM is imported on the new host box you get an error when you try and startup that VM.
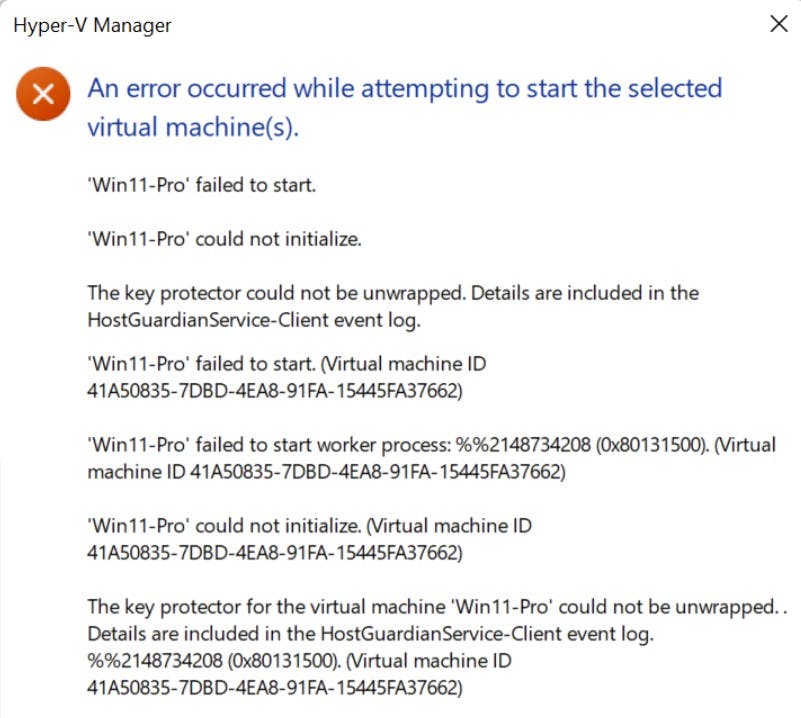
So firstly lets have a brief look at what a Shielded Virtual Machine is and then how to overcome this issue.
Shielded Virtual Machines
A shielded VM is a generation 2 VM (supported on Windows Server 2012 and later) that has a virtual TPM, is encrypted using BitLocker, and can run only on healthy and approved hosts in the fabric. Shielded VMs and guarded fabric enable cloud service providers or enterprise private cloud administrators to provide a more secure environment for tenant VMs.
With the explosion of Virtualization we have been able to take multiple physical machines and run them all on a single tin. While we have adequate security measures to secure our physical tin and its hardware, how do we essentially apply this to a virtual machine, which is now a collection of files sat on some form of storage?
What stops a single admin copying multiple virtual machine files to external storage and stealing the data?
We can actually apply the same security concepts we use to protect our physical hardware such as:
TPM/vTPM
Secure Boot
Bitlocker Drive Encryption
and apply these in software to our virtual machines.
NOTE: As of Windows Server 2016, Microsoft also released Host Guardian Service for Hyper-V Virtual Machines. I won't cover that in this article.
What is a Trusted Platform Module (TPM)?
A TPM (Trusted Platform Module) is used to improve the security of your PC. It's used by services like BitLocker drive encryption, Windows Hello, and others, to securely create and store cryptographic keys, and to confirm that the operating system and firmware on your device are what they're supposed to be, and haven't been tampered with.
https://support.microsoft.com/en-us/topic/what-is-tpm-705f241d-025d-4470-80c5-4feeb24fa1ee
Essentially in very fluffy terms, in a physical machine this is a chip on your motherboard, its own little cryptographic processor. The same technology is used to secure virtual machines. (see example of TPM enabled on a virtual machine in Hyper-V)
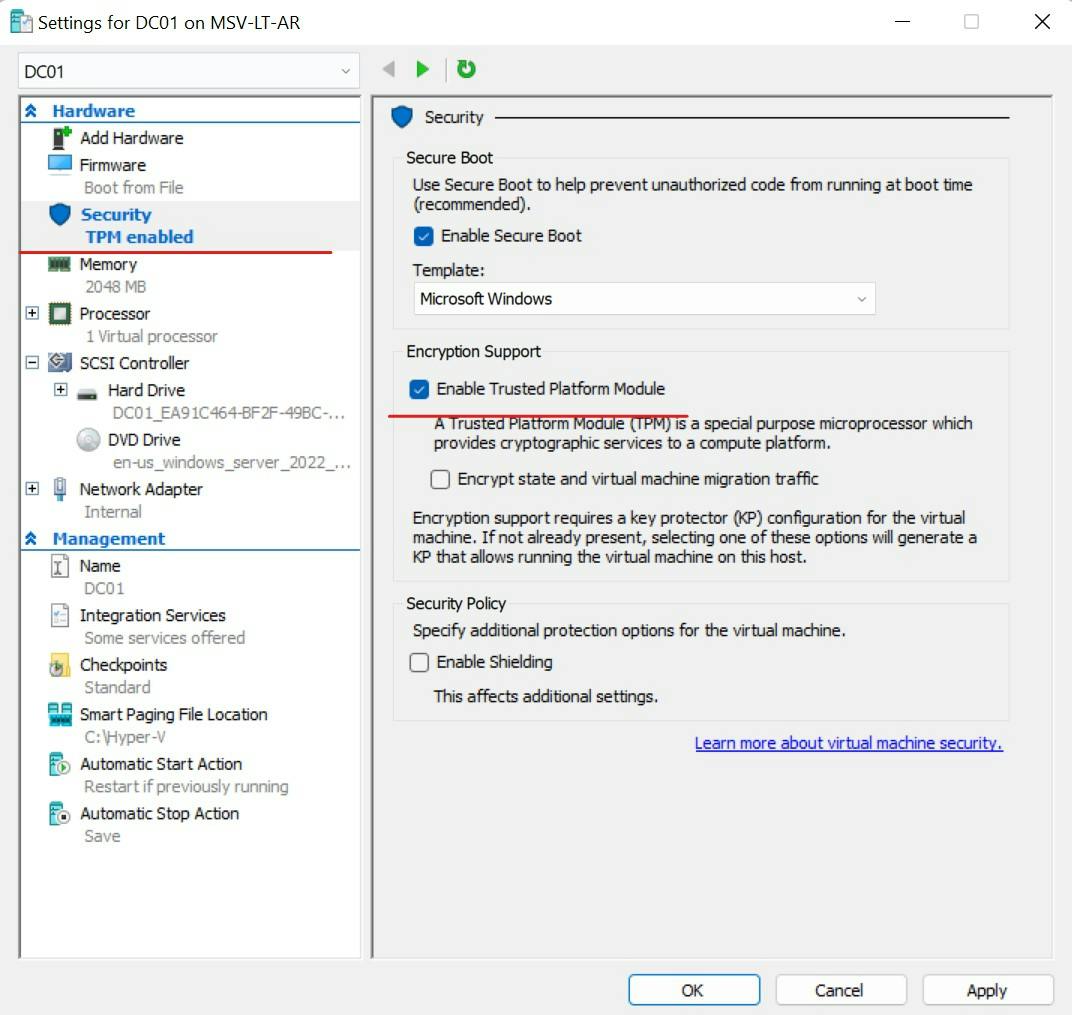
Both can generate cryptographic keys that bind to your hardware to verify integrity on boot. Change out drastic parts of your hardware in your computer upgrade and you might just flag a potential integrity issue when you fire up your machine.
Same works for Bitlocker drive encryption. Remove that encrypted drive and fire it up on a new system and you wont be able to view or even access the data rendering the disk useless to a thief or myself in this scenario. (unless you have an unlock key outside the TPM)
So with me moving the virtual machine to a new host I'm breaking the key integrity as all the underlying hardware is changing and to make matters worse, if my Virtual disks have Bitlocker encryption, there is no way my imported VM is going to be able to access the data as it can't access the keys from TPM to verify system integrity. So how do I prove I have legitimate rights to the virtual machine and the Disks?
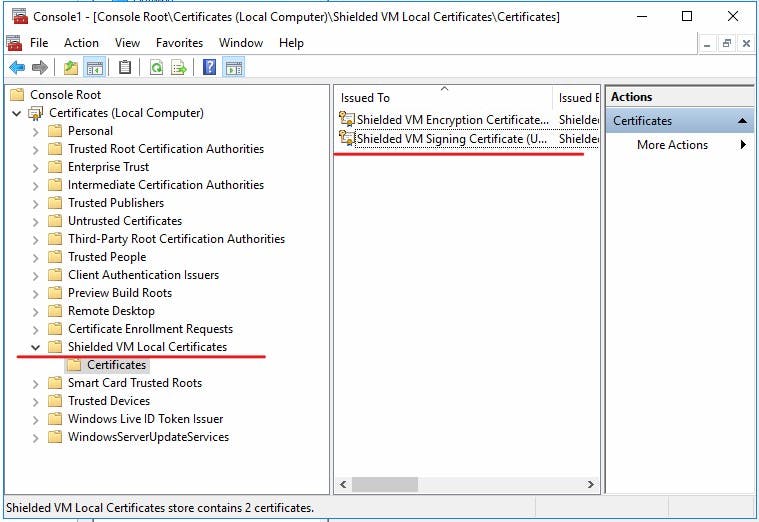
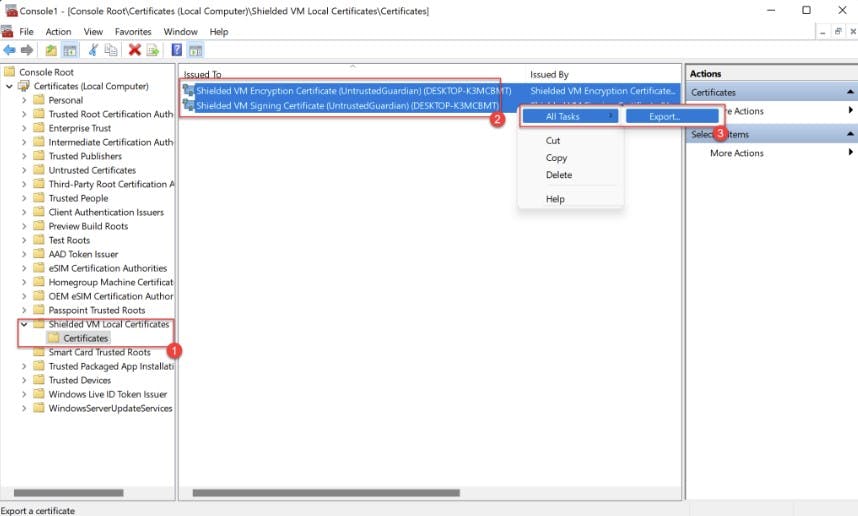
When the Trusted Platform Module is enabled on your virtual machine two certificates are generated and stored under "Shielded VM local Certificates store" on the host.
Encryption Certificate
Signing Certificate
These certificates need to be exported and Imported onto your new host.
Tip: If you are running a fail-over cluster you need to make sure these certificates are imported on EACH host in your cluster as the machine can failover and be run from any node!
Certificate Export
- Open up mmc.exe and add the Certificates Snap-in module.
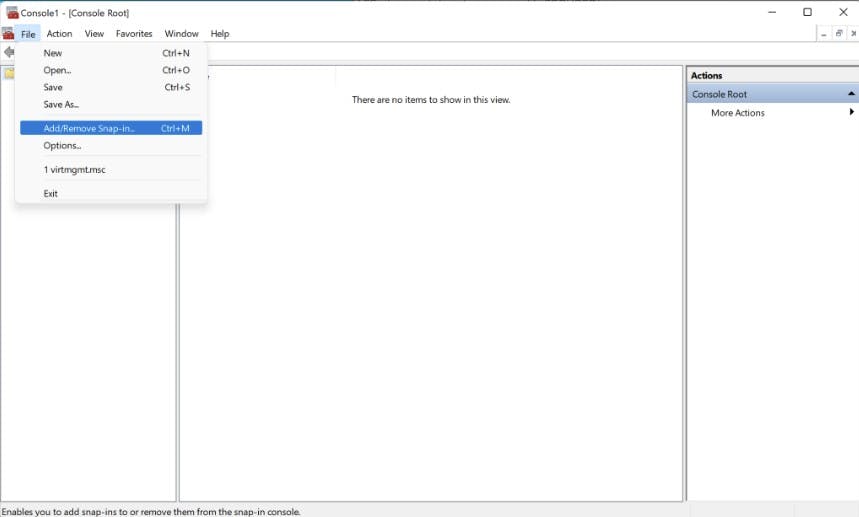

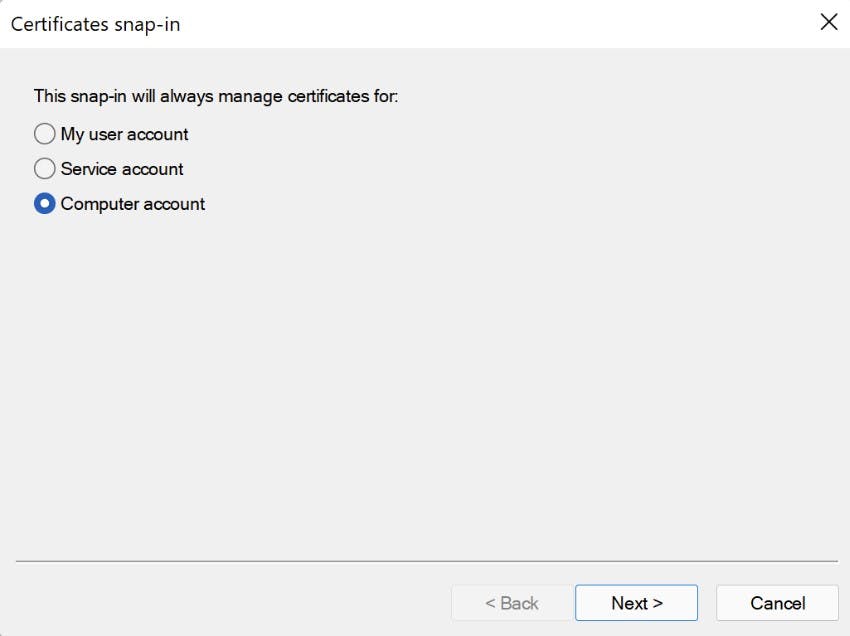
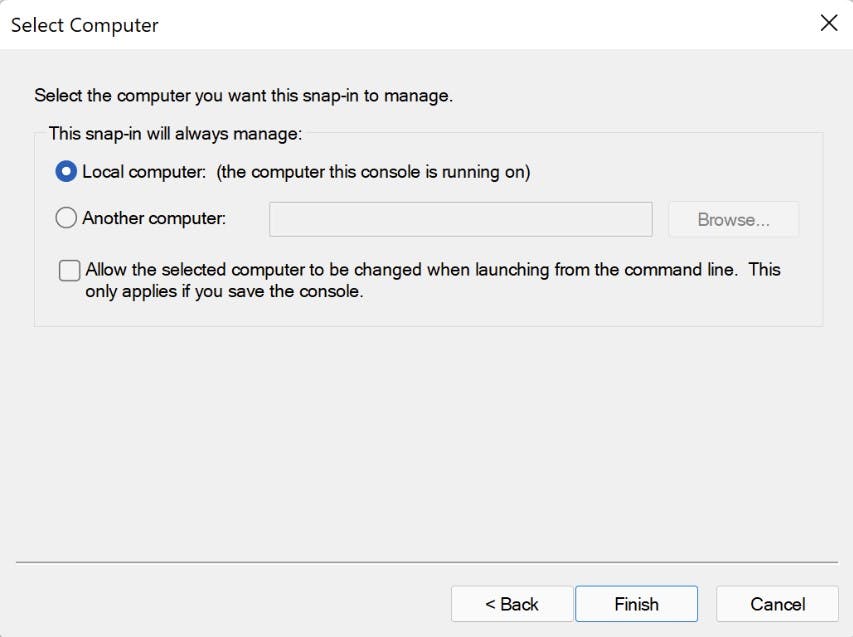
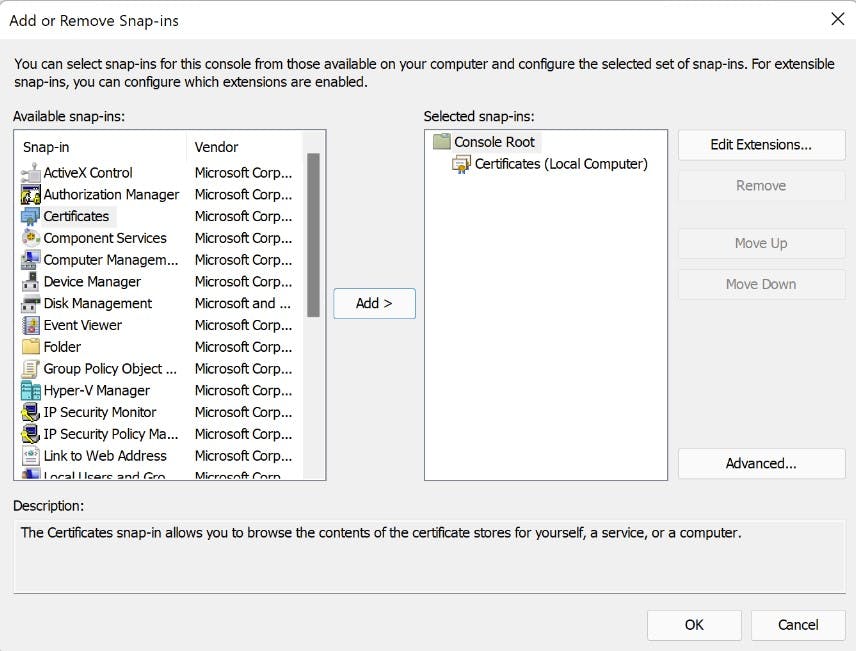
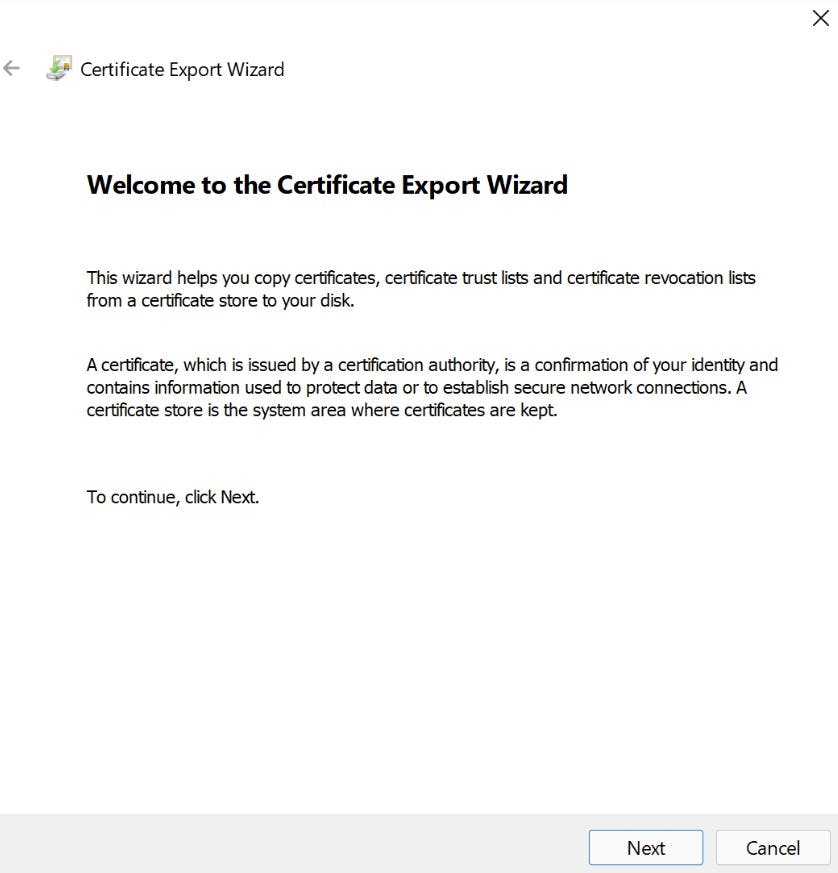
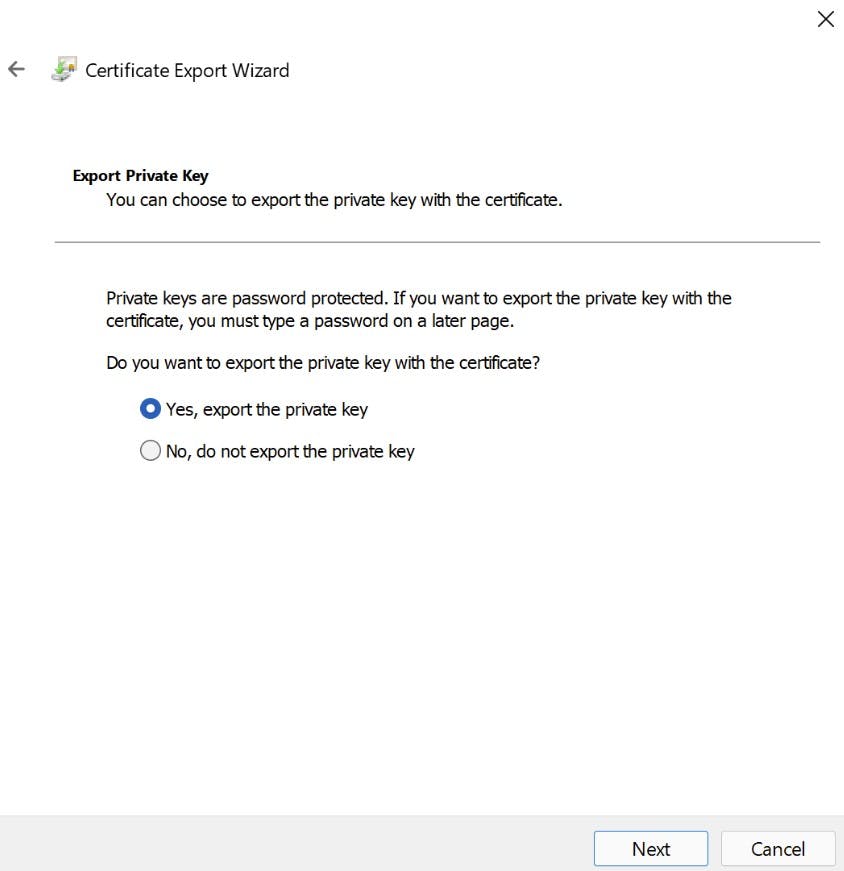
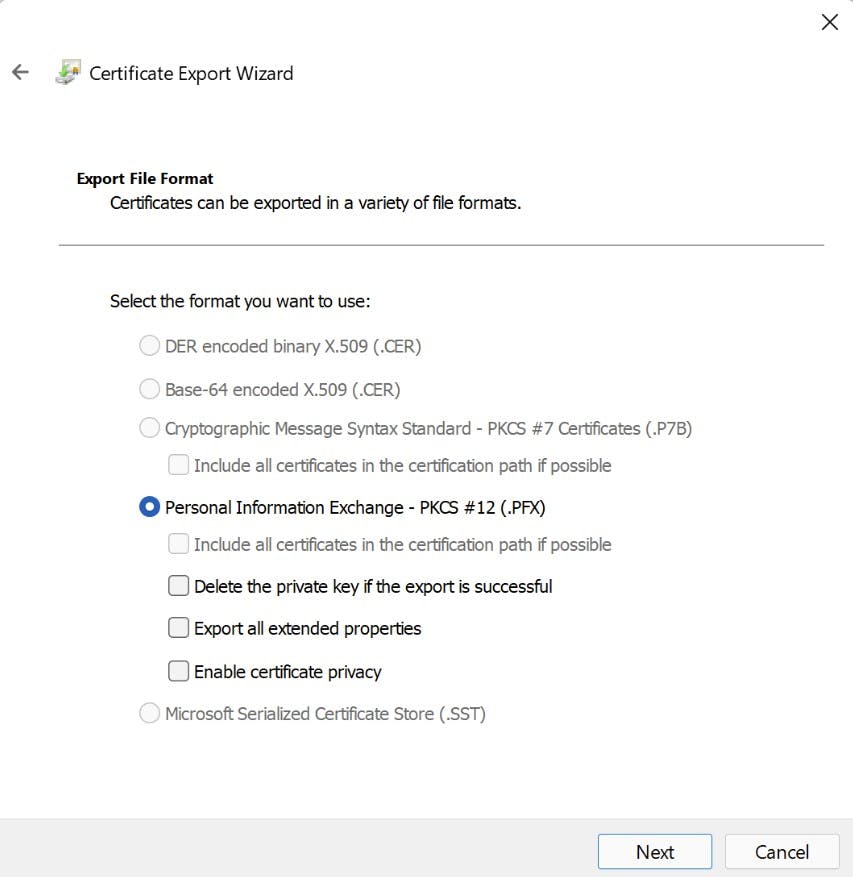
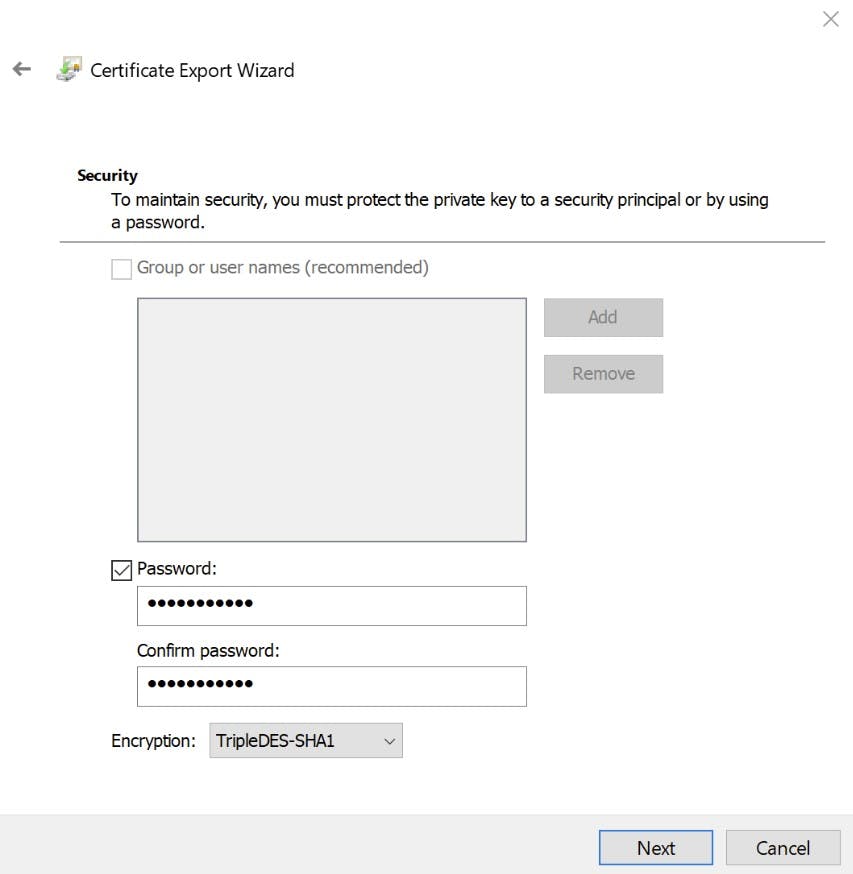
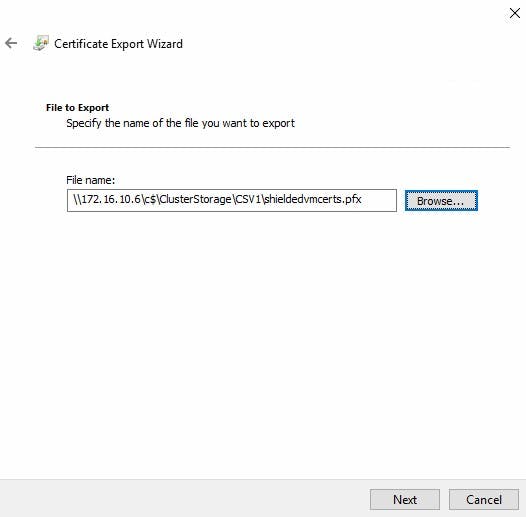
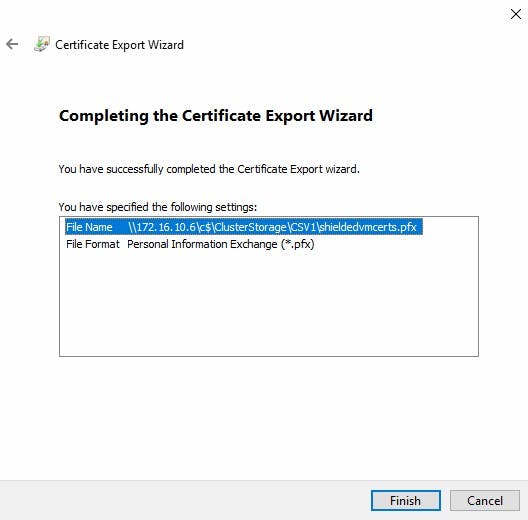
- Navigate to "Shielded Virtual Machine Local Store" Highlight both certificates and select "Export" from All tasks. Export as .PFX (I'm Exporting to my new fail-over cluster). As we are exporting the private key you will need to provide a password.
Importing the Certificates
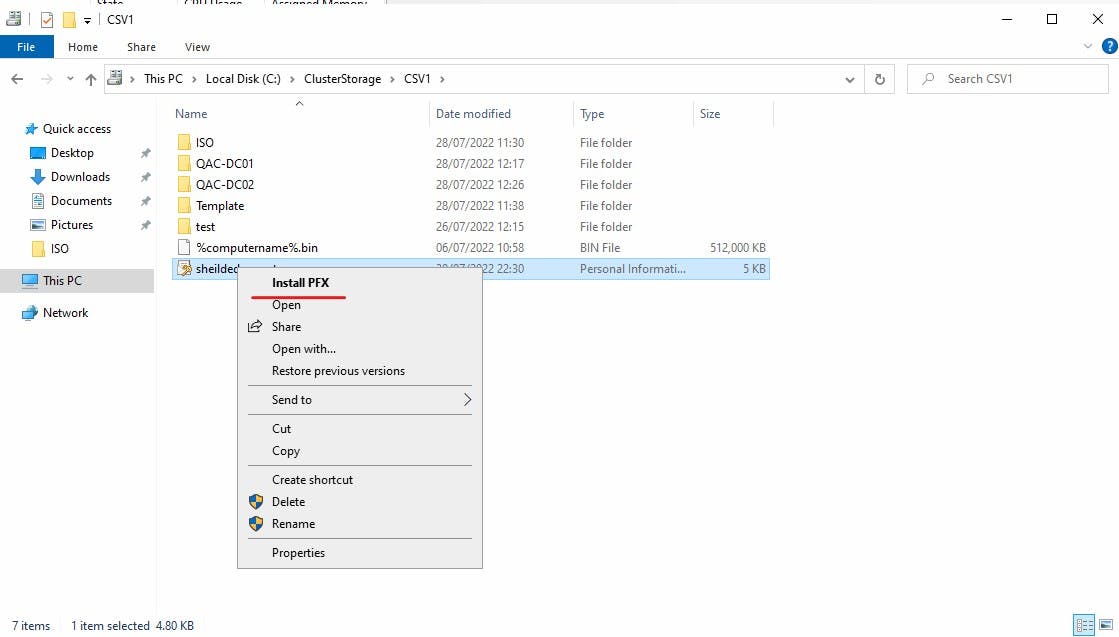
- Navigate to the place where you saved your certificates. Right-click and select "Install PFX" to start the import wizard. We want to place these in the same store "Shielded Virtual Machines Local Store" You will need the password you used in the Export to Import the certificates.
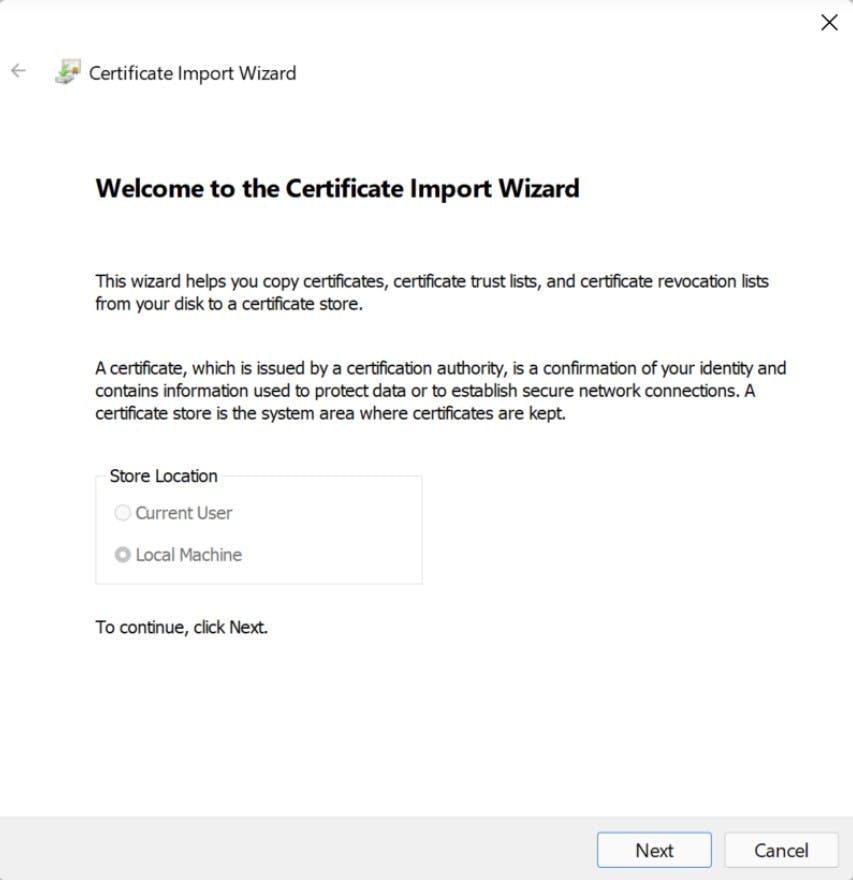
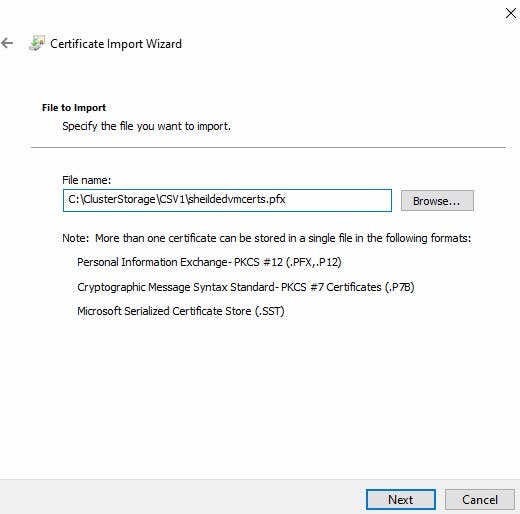
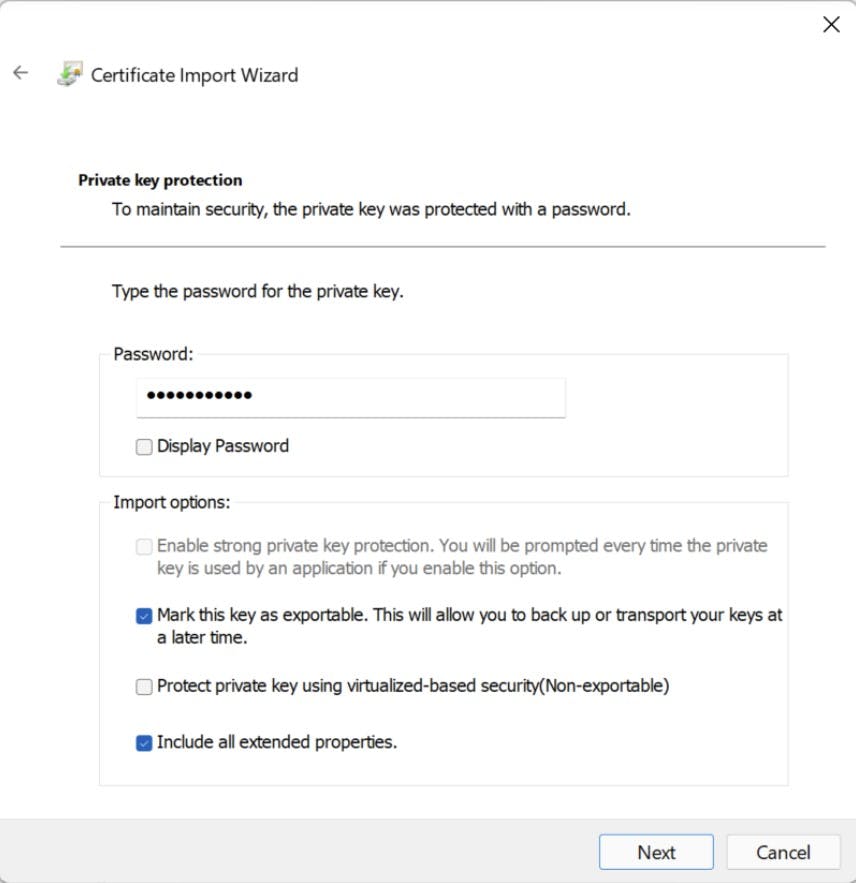
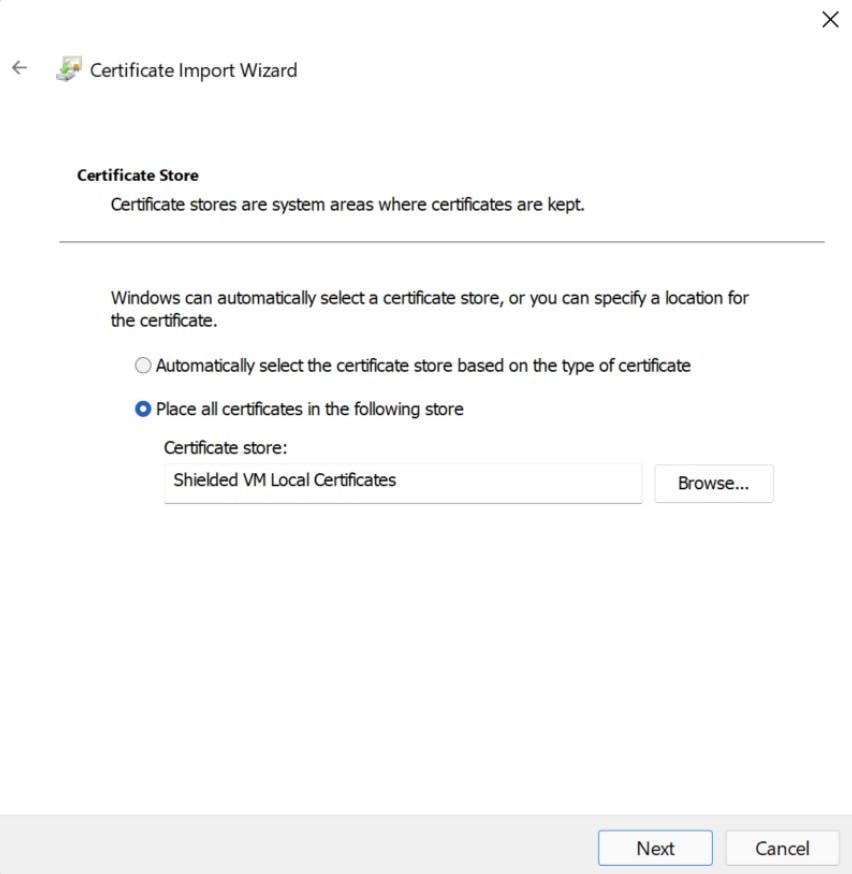
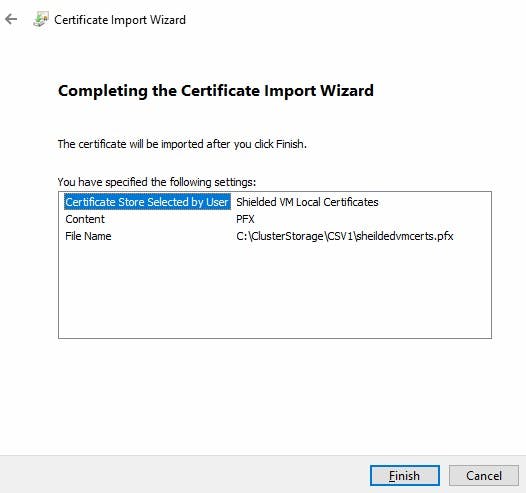
When you verify the certificate store on your new machine you should see four certificates, two for the existing host then the two certificates for the imported host.

You should now be able to fire up the Virtual Machine on the new host box.
Summary
In this article we looked briefly at Shielded Virtual Machines, the purpose and use of a TPM for the scenario faced, how to export and import the signing and encryption certificates onto the new host so we can use the virtual machines protected by TPM.
*TIP: When Importing my certificates the Shielded VM local certificate store was missing. You can enable this by building a test VM and enabling Trusted Platform Module under Security Settings of the virtual machine.
Hope this article was informative, see you next time.
