Introduction
I have had the luxury of rolling out several Aruba InstantON deployments for a restaurant chain in the last year. And more sites are coming online into this deployment. So I thought it would make a nice little demo for those of you who may be interested in seeing how Aruba InstantON works and some of the features you get out of the box.
Firstly Aruba InstantON is more aimed at small businesses rather than large enterprises and is mainly touted for its usage simplicity. No need for command lines here, you can even use your mobile phone to configure everything you need to get started. This demo though will be using the desktop web browser.
InstantON Marketing
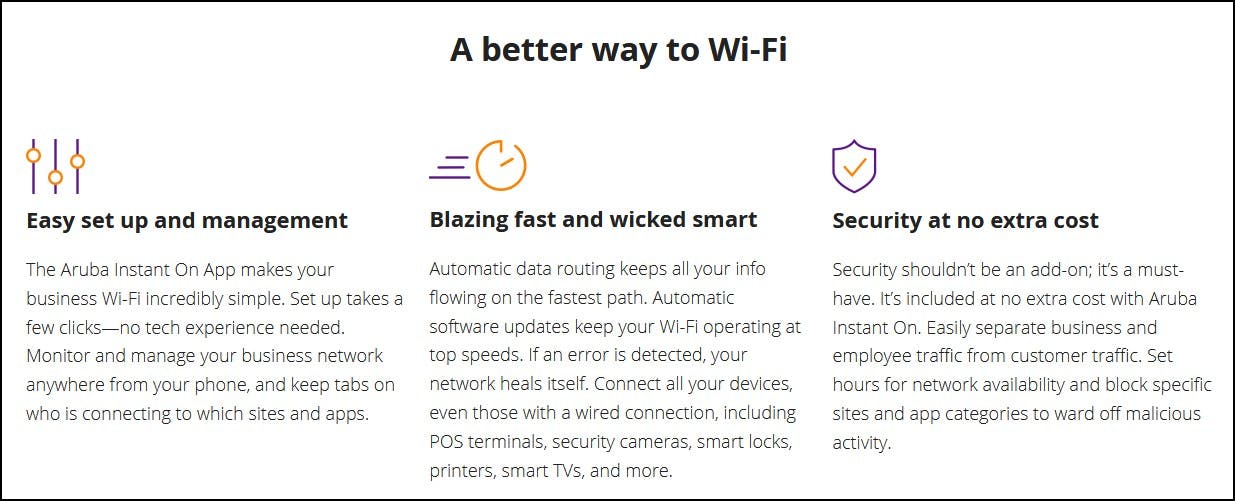
Obviously for InstantON to be able to manage the devices in its portal the devices must be InstantON Models. Other Aruba models will require Aruba Central which is Aruba's main cloud management platform.
InstantON and Aruba Central are two separate platforms that support different models and features, so bear that in mind.
For more information visit the Aruba InstantON website:
https://www.arubainstanton.com/
Demo Items:
We will cover some of the major setup components in this demo but it is by no means an exhaustive list:
Creation of a site
Adding Devices to a site
Wired and wireless network configuration
Basic Device Management
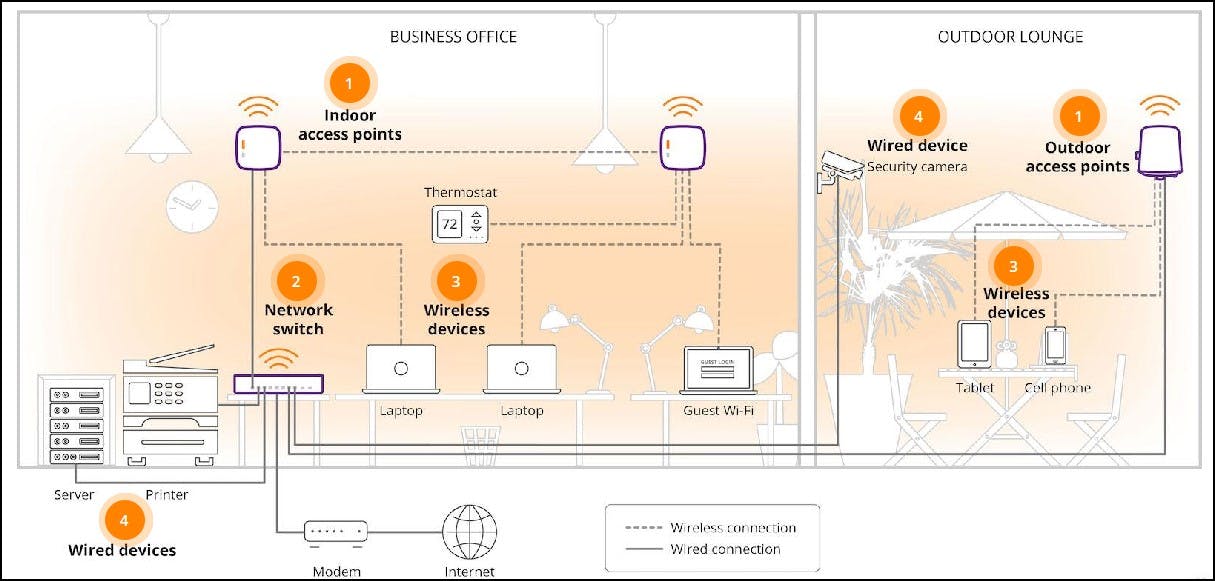
As a reference the network is no more complicated than the below graphic from Aruba (with a few VLANS thrown in):
Equipment:
1x 1930 48G POE+ 4SFP+ switch
Ports 1-4 = APs
Port 48 = Link to the cloud via gateway
4x AP22's
Wired Network:
| VLAN | Name | Network |
| VLAN 1 | ARUBA_MGMT | LAB Network (DHCP Firewall) |
| VLAN 10 | Staff | 192.168.10.0/24 (DHCP Firewall) |
| VLAN 30 | EPOS | 192.168.30.0/24 (DHCP Firewall) |
Wireless Networks:
| SSID | VLAN | Network |
| STAFF | VLAN 20 (Bridged) | 192.168.20.0/24 |
| EPOS | VLAN 30 (Bridged) | 192.168.30.0/24 |
Aruba InstantON Portal
You will first need to create an account and sign in.
From here you can then create multiple sites and then allocate administrator access to relevant sites if required.
When dealing with the restaurant chain we use multiple sites in a single portal to view the health of all running sites
For devices to check in with the InstantON portal you will need your devices to acquire a DHCP lease that is on a network that has access to the Internet.
By default, VLAN 1 on the switch is used for management purposes to talk to the cloud so some configuration settings on this VLAN will be restricted. Can you change this? There is a convoluted way via the CLI but at present, it doesn't seem possible via the GUI.
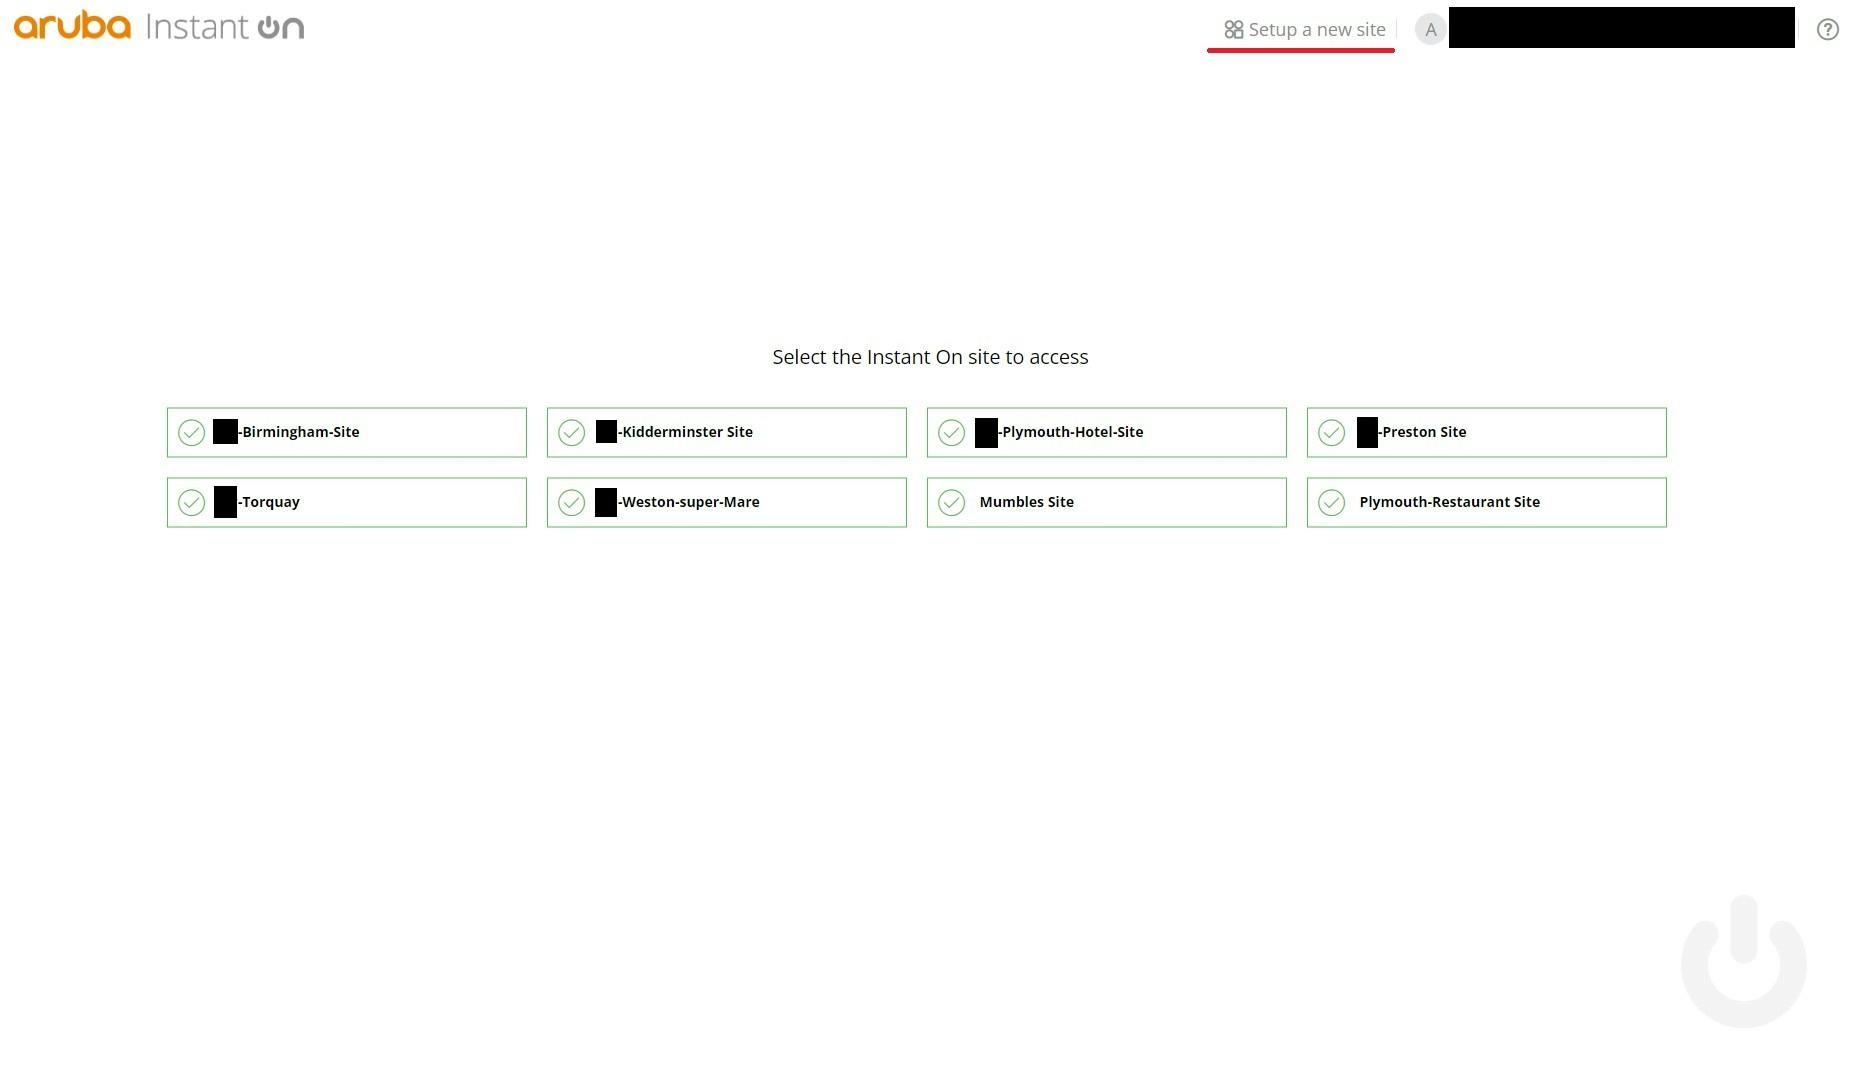
The below screenshot shows the login portal and the number of sites that are already active. Everything is green and happy. Any errors will be shown in RED or AMBER per site. From here you can also create a site, which is what we will do next.
Create a Site
After clicking "Setup a new site" from the portal page. it will guide you through the setup wizard:
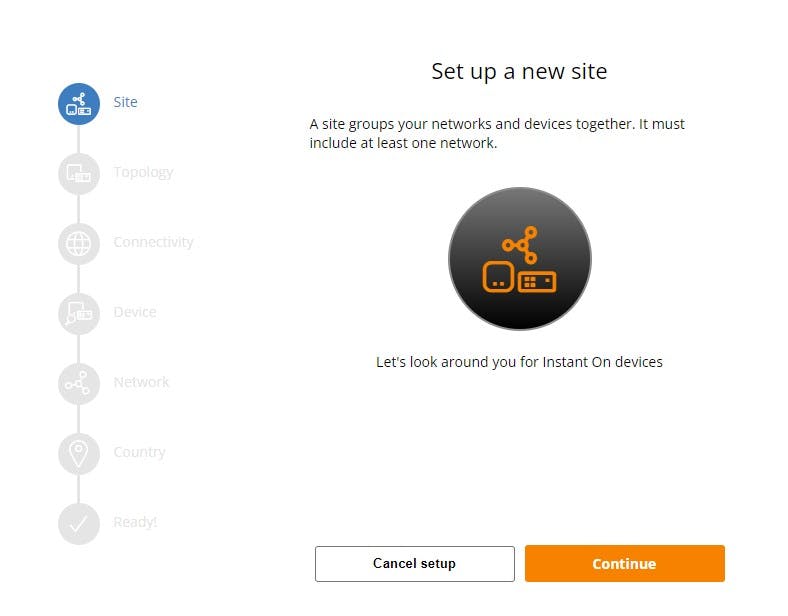
My setup includes a switch and APs. You may be in a situation where you just have access points and that's fine provided they also get a DHCP address on a network that can talk out to the Internet.
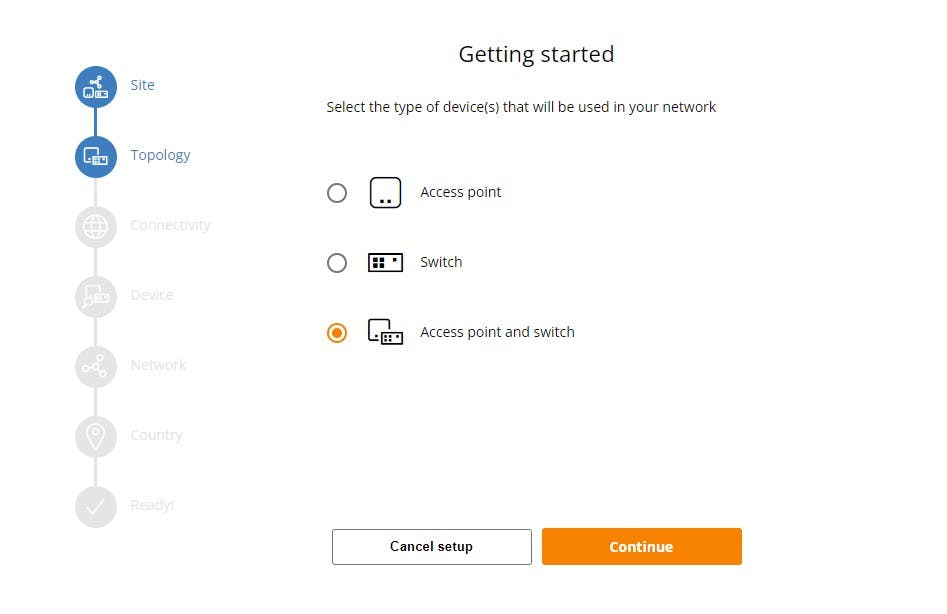
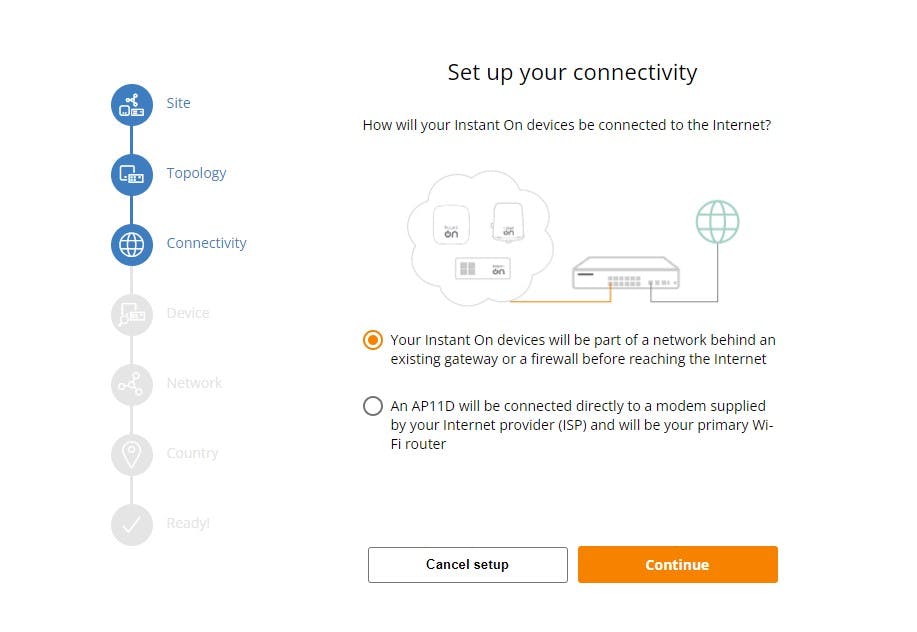
Yes, my switch and APs will live behind a firewall (gateway to the Internet).
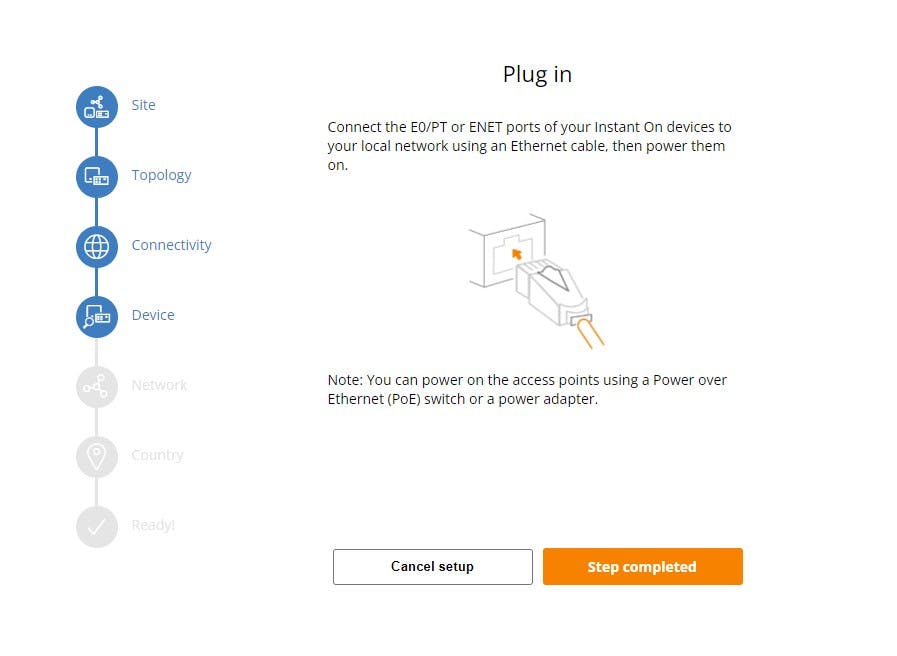
I have just hooked the switch up for this Example so just said completed as the switch is talking to the cloud.
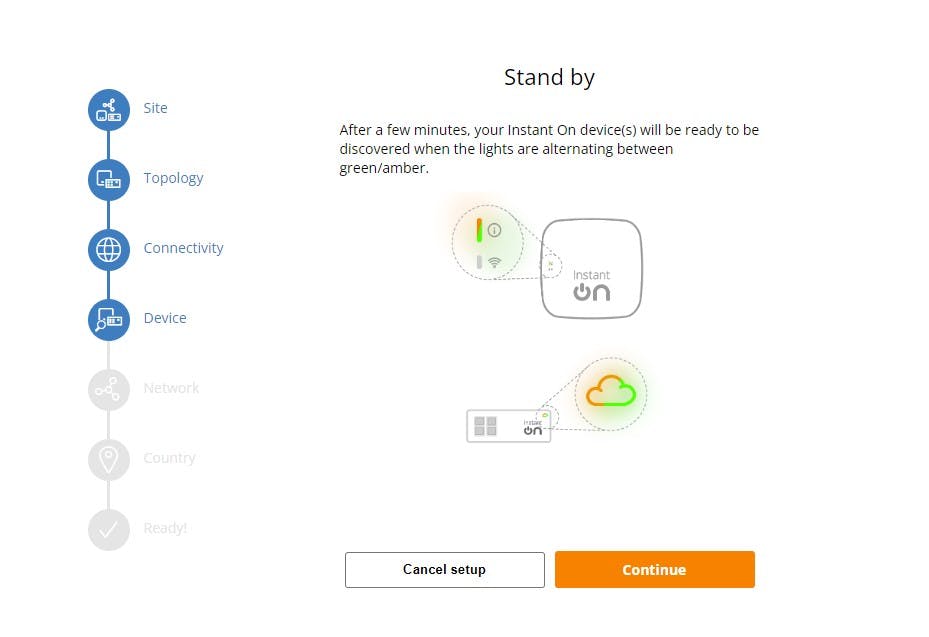
I have the alternating LED light as described below so my switch is ready:
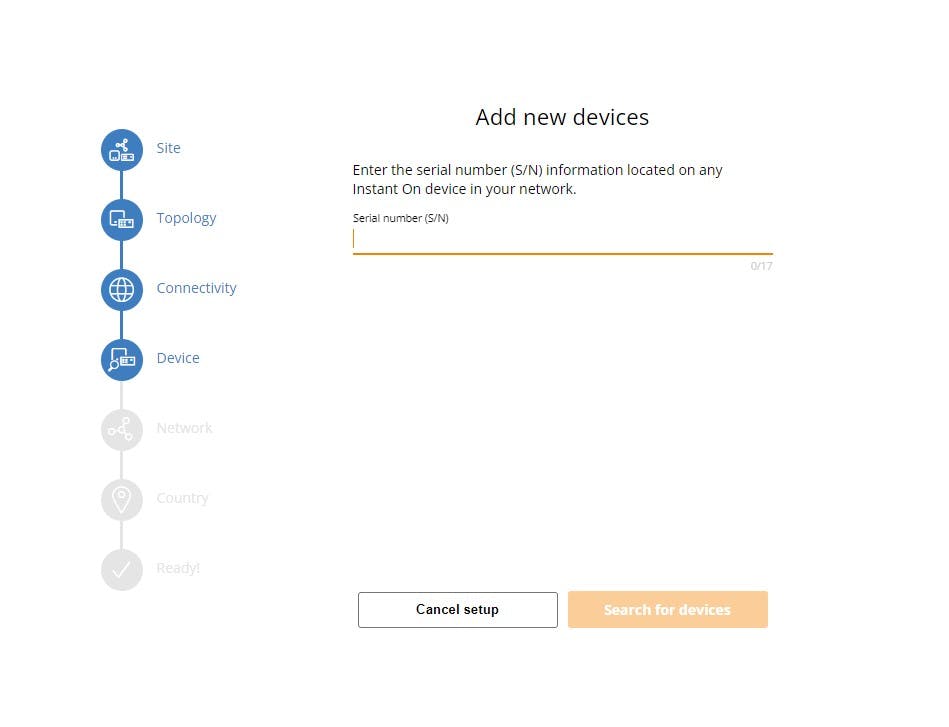
You will now need to enter your device serial number, this comes stickered to the relevant devices and is clearly marked.
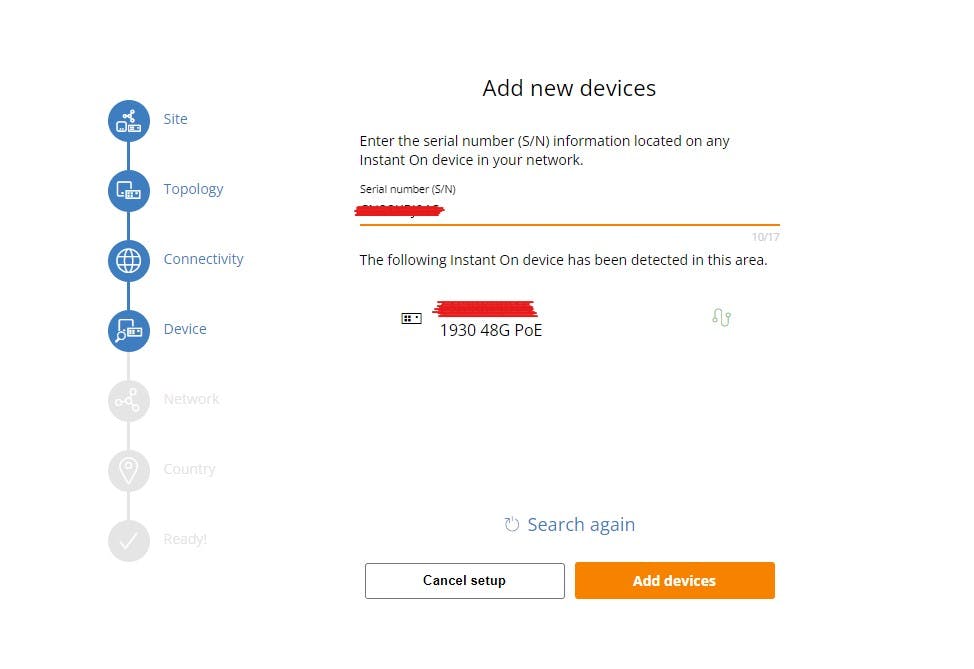
As you can see it has detected my 1930 switch from the Serial Number input, we simply want to Add Device:
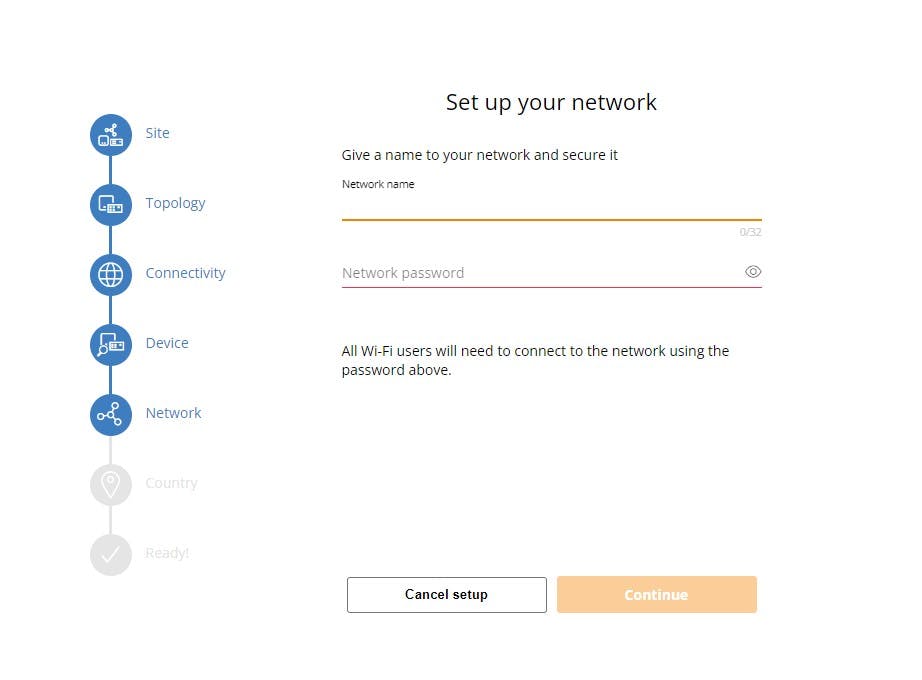
You will now need to name your network, this will create a wifi network for you, I will overwrite this later:
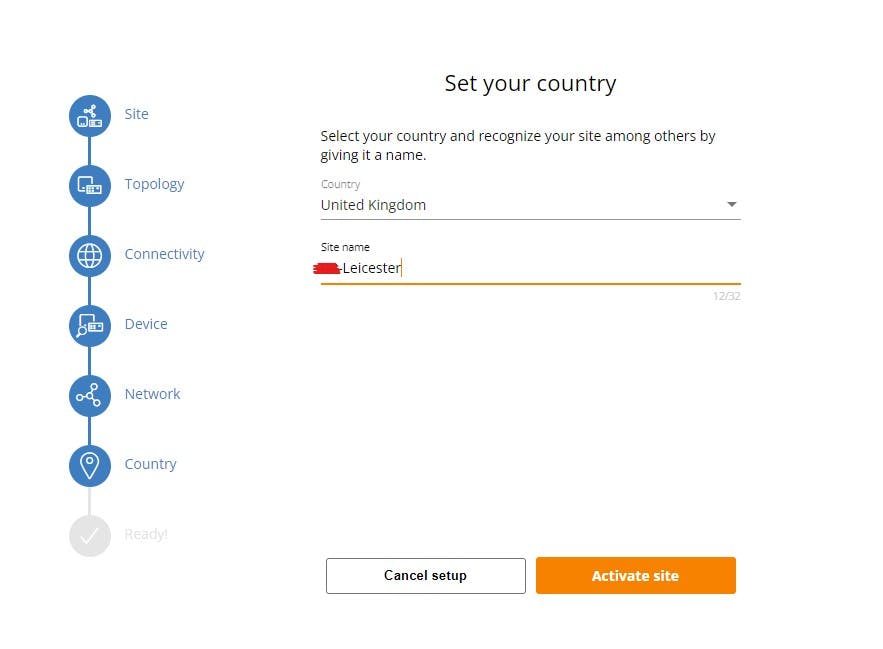
Finally, you will be asked to name the site, this will be the name you see in the main portal and you can also change this later:
Once the site is created you can navigate via the menu:
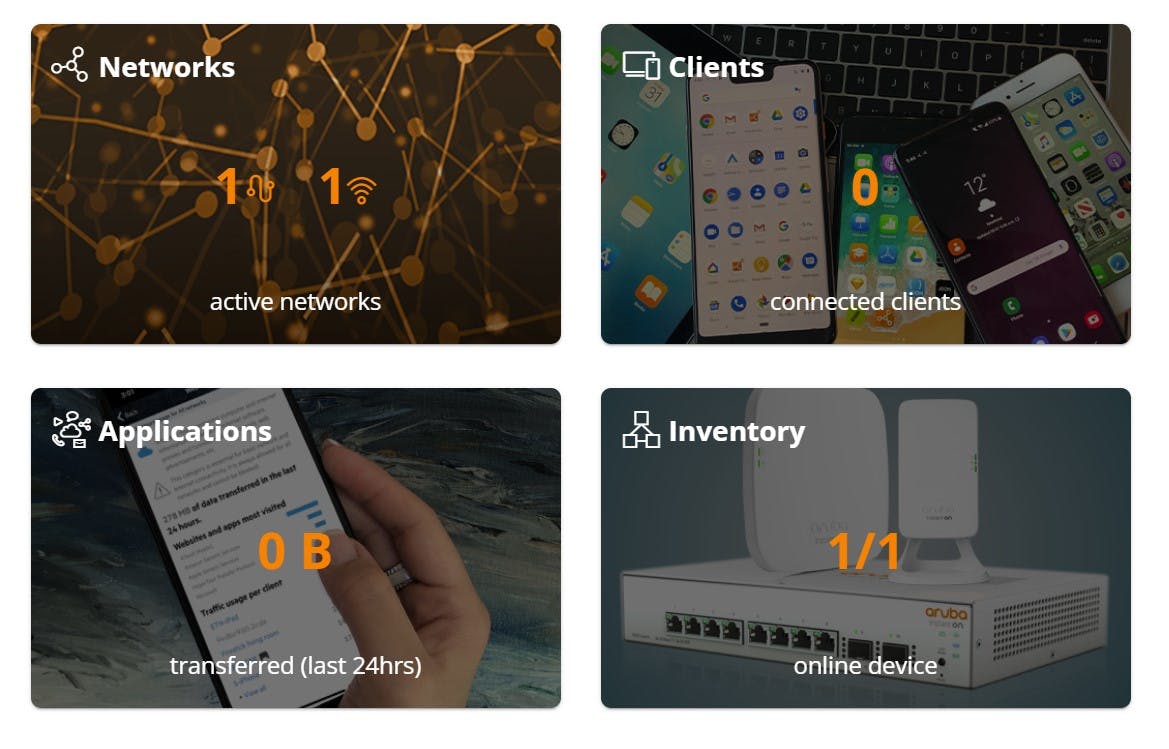
Networks - Can add wired and wireless Networks and manage the settings
Clients - View and manage all connected clients on the network
Applications - View the network usage
Inventory - Manage and configure your devices
Add a New Device(s)
We will now add the APs to our site:
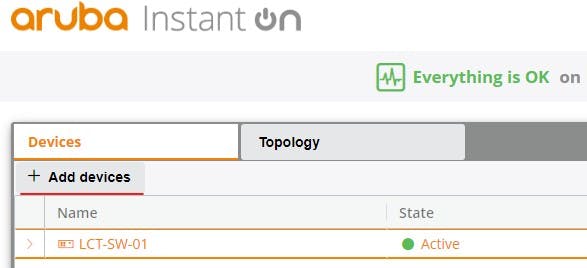
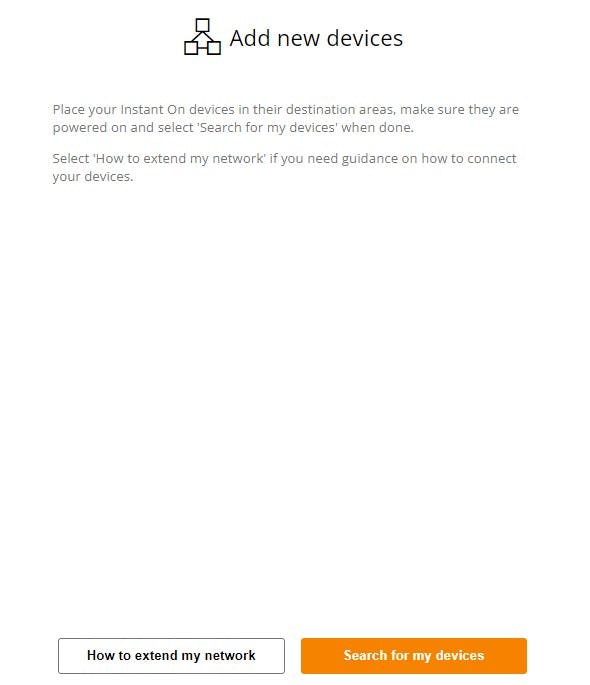
I have attached my 4 AP22's to ports 1-4 and they are flashing green/amber so are ready to adopt, Select "+ Add devices" from the "devices tab" in the "Inventory" section:
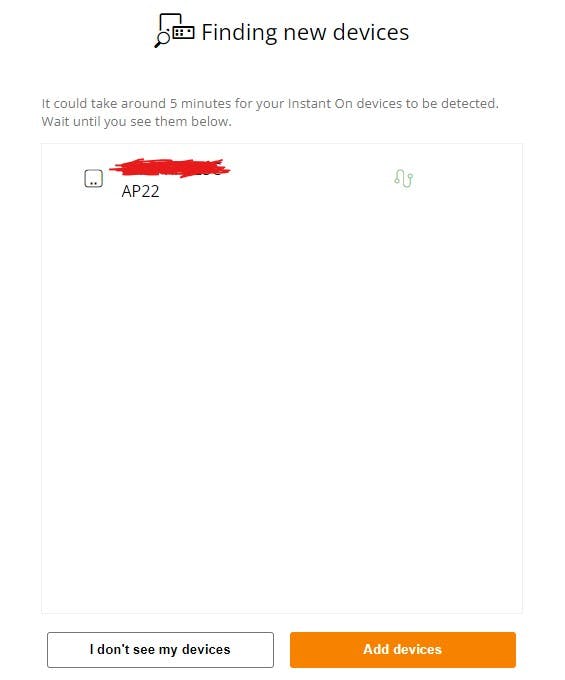
And yes you can add devices in bulk as per the below screenshot:
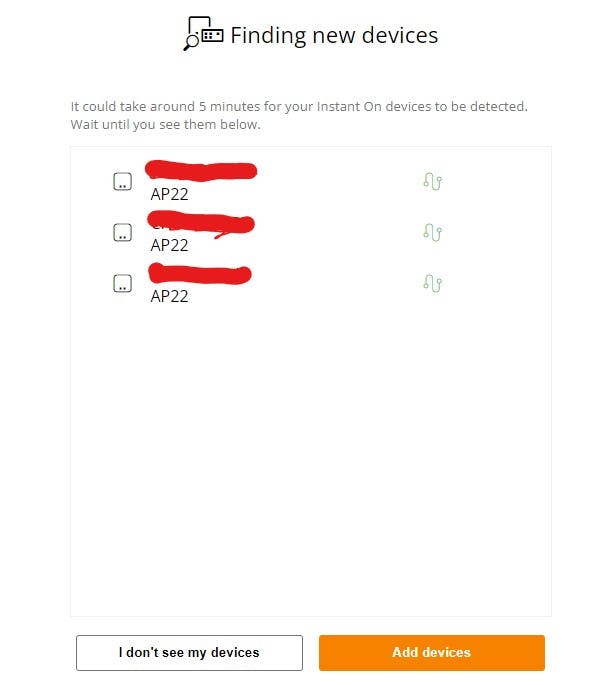
Simple, all devices are now added and will appear in your inventory, lets now look at Building out the VLANs and Wireless networks:
Wired Network Configuration:
Navigate to "Networks" section at the bottom of the screen Or click the Aruba InstantOn logo top left and select "Networks" Then click "+Add"
I need to create VLAN 20 (Staff) and VLAN 30 (EPOS) I will then also create these as a wireless network and bridge it to the wired VLANS so they share the same subnet.
Identification:
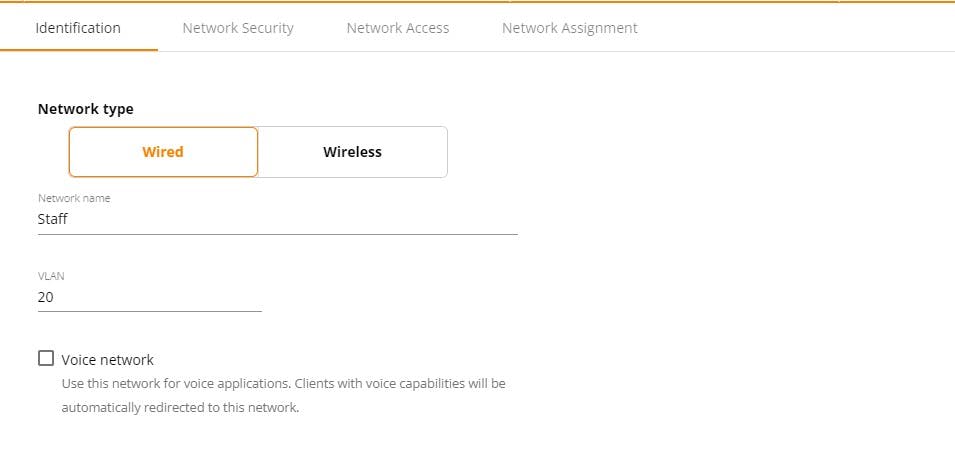
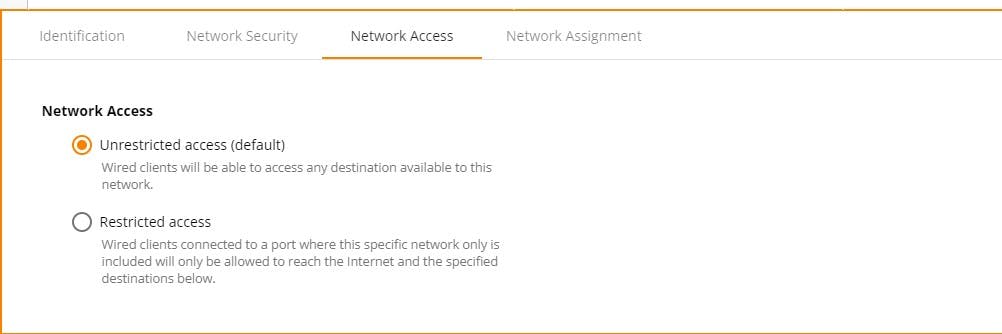
Network Access:
You get a choice to make your network restricted or Unrestricted. For this employee network, we will keep it unrestricted.
Network Assignment:
Network Assignment allows you to untag/tag (Access/Trunk ports if you're from Cisco) ports on the switch for the VLAN. When you create the wireless network it will automatically add the tagging to the APs you select to broadcast the SSID.

Rinse and repeat for VLAN 30
Wireless Network Configuration:
Again from the "networks" panel, select "+ Add"
Identification:
This time we want "wireless" and it will be for "employee" use. The name will be the SSID that's broadcast. You can set a PSK (WPA2+3 supported) or point to a radius server for authentication against AD (for example)
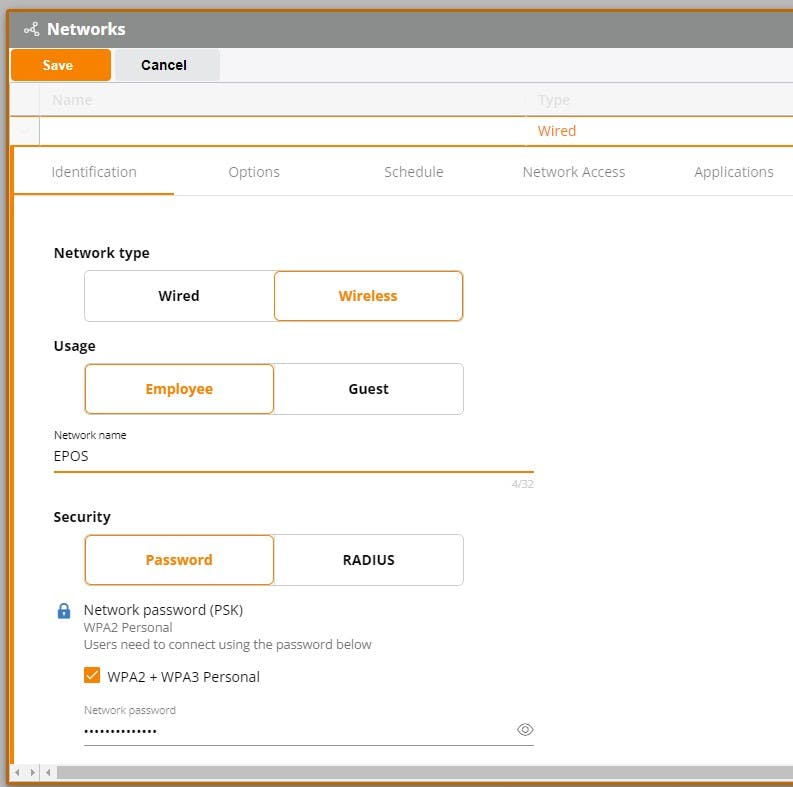
Options:
The ability to not broadcast the SSID (Hide your network)
Enable WIFI 6 if your APs support this standard.
Control Bandwidth limits (ideal for guest Wifi).
Control radio frequencies allowed
Bridge or NAT mode
Because this is EPOS I want to bridge it with my VLAN 30 so it shares the same subnet. I can select EPOS from the drop-down (Assigned Network). NAT mode allows you to enter a unique subnet for this wireless network if you do not wish to bridge with a wired VLAN.

Network Assignment:
"Network Assignment" I can select which of my APs will broadcast and allow users to connect to the wireless network. This will automatically TAG the wireless VLANS on the switch ports all these APs exist on (1-4)

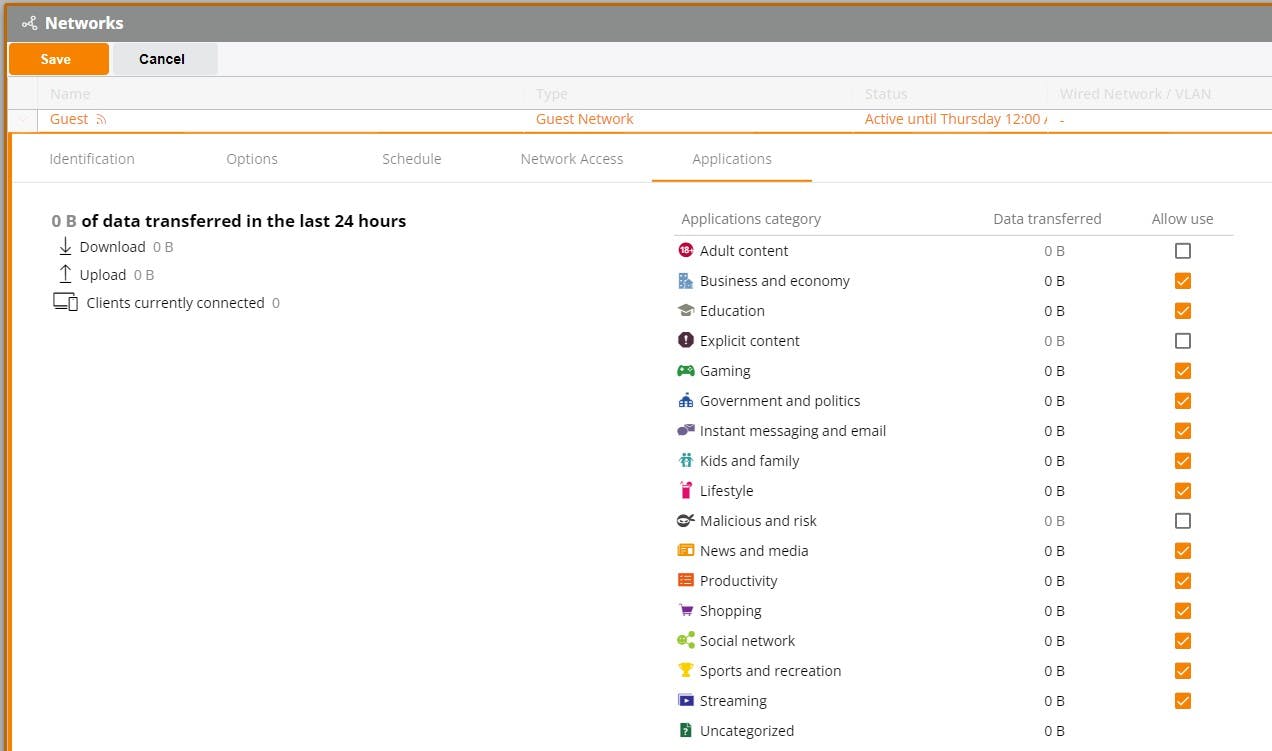
Applications:
"Applications" allows you to allow/disallow content categories with a simple check box.
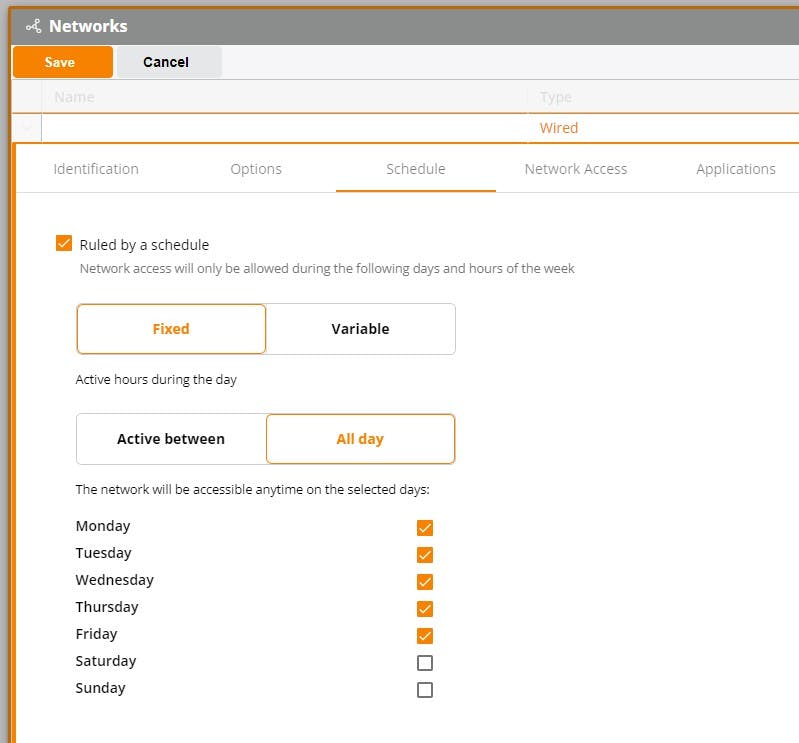
Schedule:
"schedule" Allows you to create a period for when a said wireless network will be available for people to connect. (Below is an example of a Guest wireless Network)
Now you know how to add devices and networks lets now see what controls we have to manage our devices
Switch Device Management
Identification:
If we click on the switch I can give it a name: "LCT-SW-01" this will update it in the inventory list rather than seeing the serial number. Other Settings:
MAC Address
Model and Version
Uplink MAC (port to cloud)
IP Address of the switch (VLAN 1 SVI)
POE Budget/Consumption

Connectivity:

Automatic = DHCP
Static = set static IP
Routing = Allow inter-VLAN connectivity (layer3 switch)
Jumbo Frames = Higher MTU Support
Ports:
The "Ports" tab allows me to see what ports are currently active (4 APs and my Cloud link)

For a more in depth look at the available settings, here is a port (13) from a functioning switch that has a PC + Phone attached:

Port is enabled/Shutdown
Port number and the user given description
Speed and power draw
Port authentication settings (802.1x supported)
Access VLAN
Tagged VLANS
Lock clients down by MAC address once connected.
Power management (increase power draw if needed or create a power schedule)
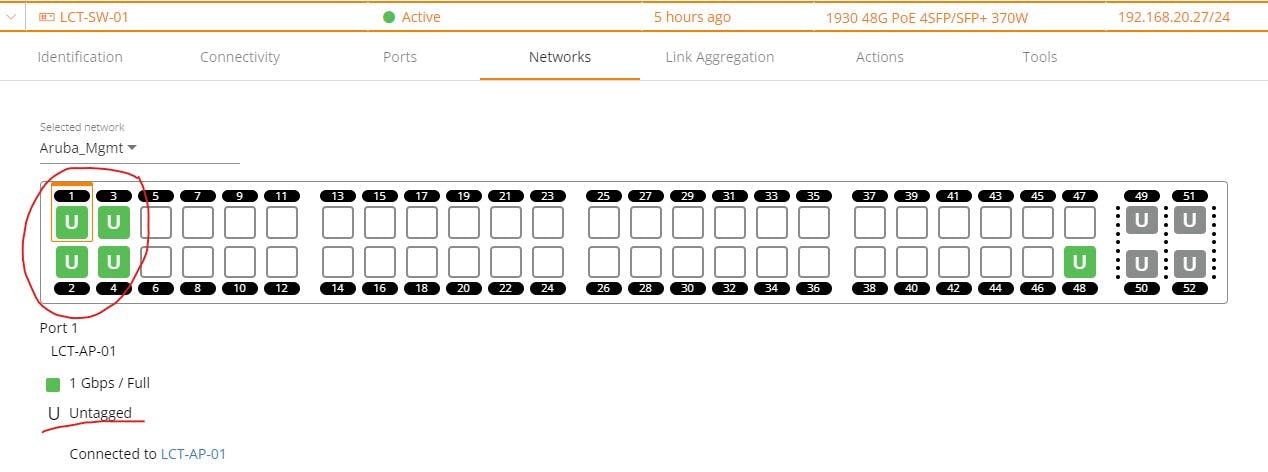
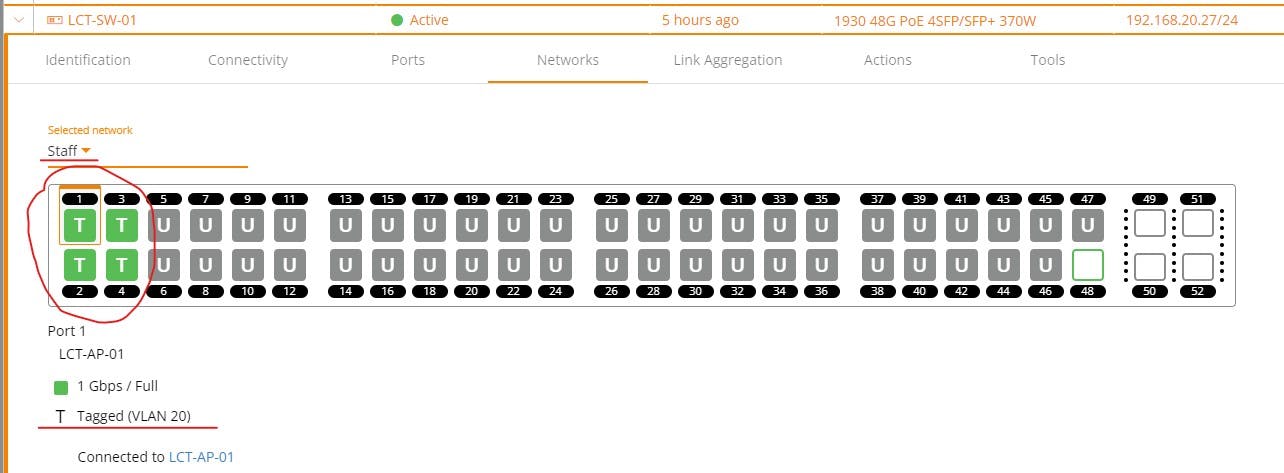
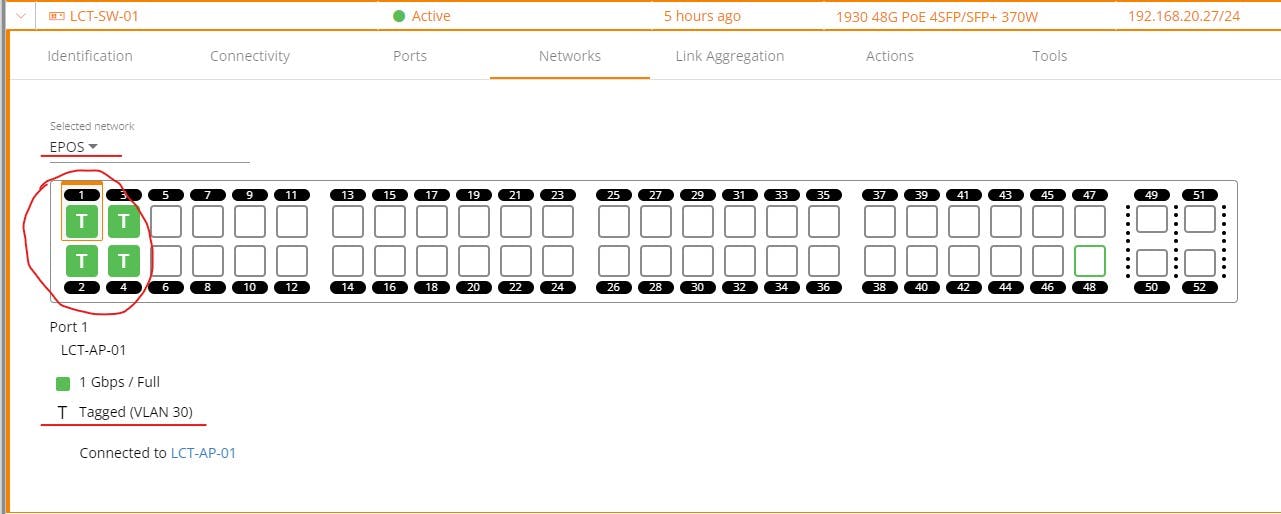
"Networks", allows me to view VLAN Tags/Untags (Access/Trunks if you're from Cisco World). The below screenshots show my APs are untagged VLAN 1 (Native) to talk to the cloud. My wireless networks are then tagged over the top:
Link aggregation:
This supports the bundling of ports for increased bandwidth also known as Etherchannel.
Static
LACP
Actions:
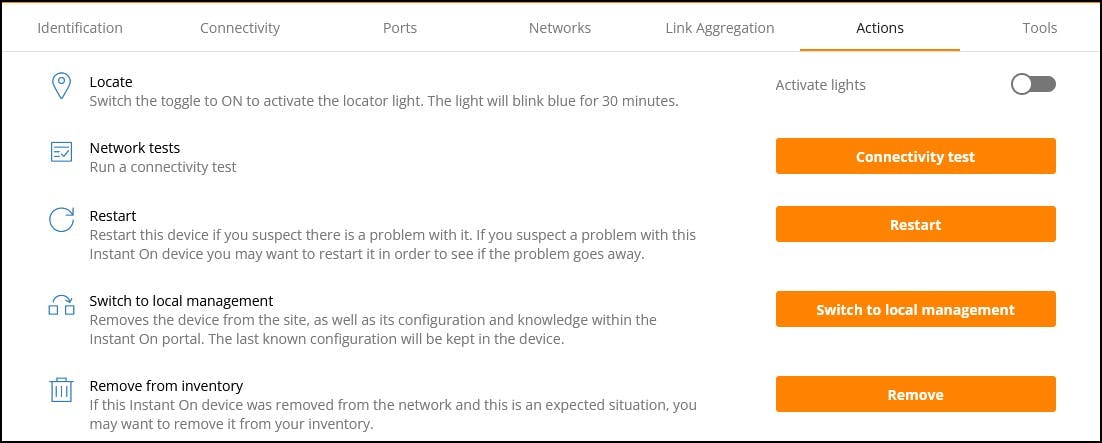
Locate = Displays LED locator on the physical Device
Network test = PING etc
Restart the device from the portal
Switch to local management = GUI locally at the SVI.
Remove from inventory = remove the device from the site and portal. Use this if you need to re-provision in a different location.
Wireless Device Management
Identification:
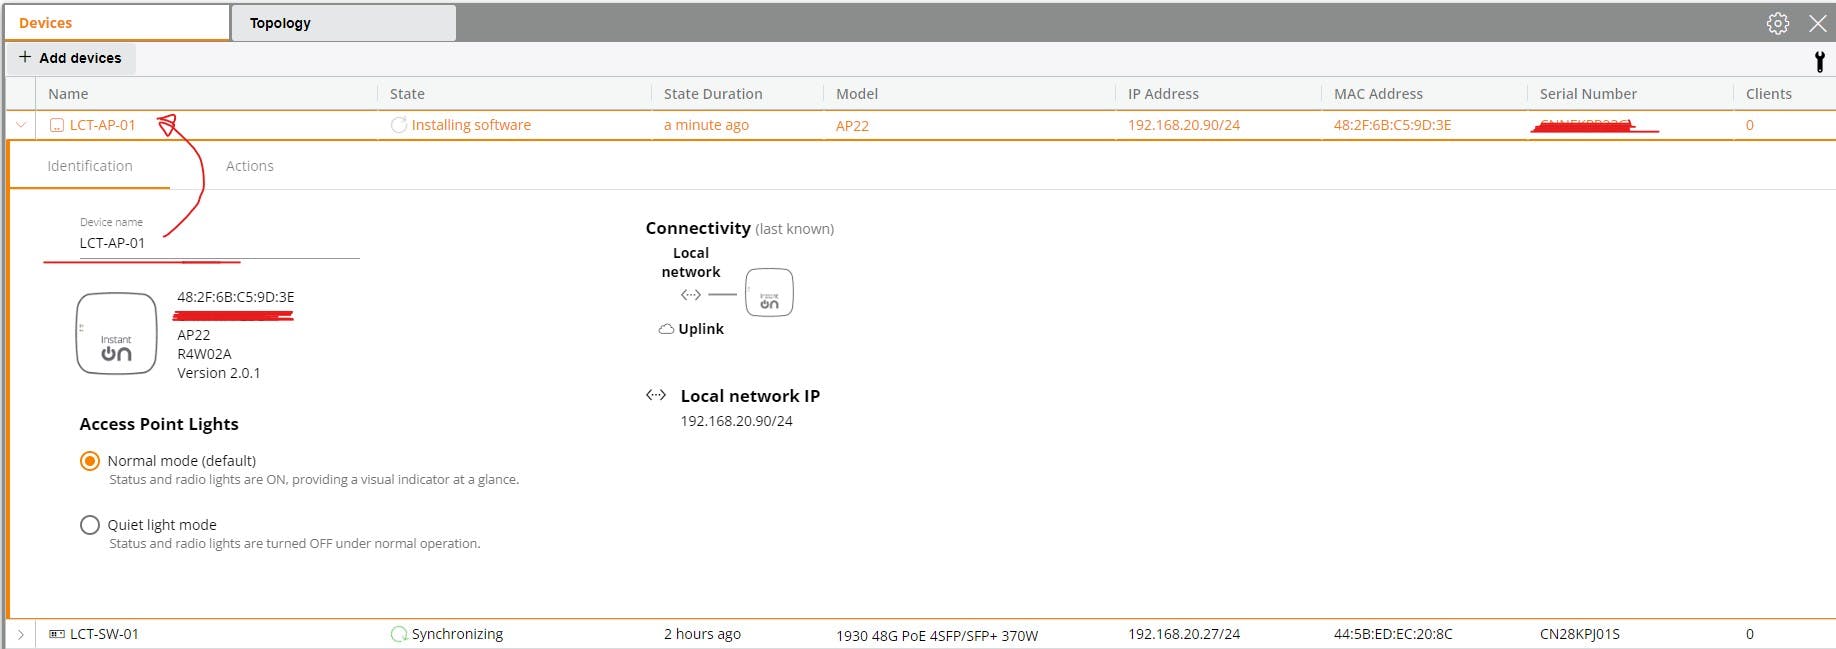
Given Device Name
LED control for physical device
Uplink MAC
Local network IP (VLAN 1)
Connectivity:

Automatic IP assignment via DHCP
Static IP Assignment
Ports:
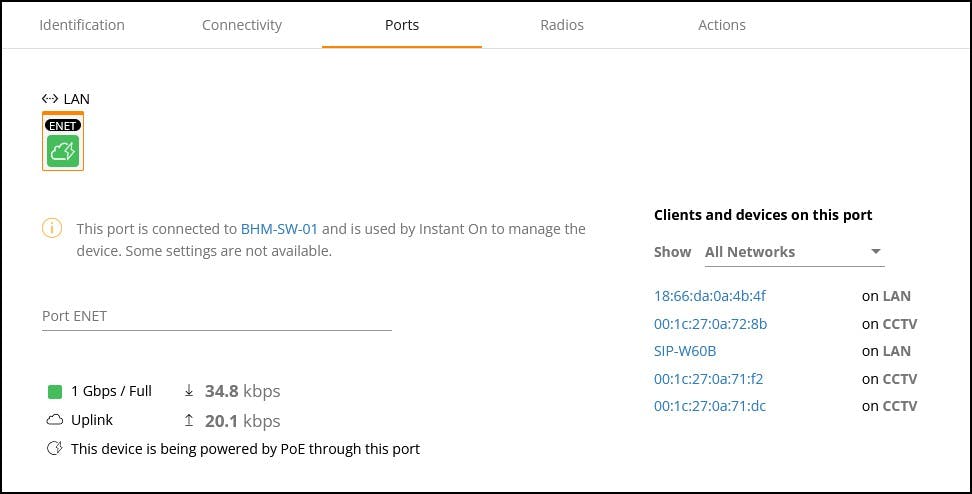
Status of the uplink Port
Given Port description
Traffic statistics
Devices using this AP and the network they belong to
Radios:

Control radio settings for 2.4 and 5GHz radios.
Select wireless networks they broadcast (This is also assigned from network assignment panel in network creation)
Actions:

Locate = Turn LED locator indicator on physical device
Network Tests = Ping etc
Restart the AP from the portal
Remove from inventory (Use if you need to re-provision to another site)
Summary
I hope this has given a decent insight into how easy it is to set up an Aruba InstantOn deployment and given a flavour of just what capabilities you get out of the box. Again this is aimed at small businesses and probably won't scale well in an enterprise model.
There are of course more advanced features such as switch stacking support and additional security features available I have not gone through. I may cover these at a later date but, I advise as always do your homework to see if the capabilities fit what you need.
If you have any questions feel free to ask and I will endeavour to answer for you.
