#Background
In the first article we built an Azure Virtual Desktop lab that consisted of cloud only infrastructure. We deployed Storage accounts ready for FSLogix profile containers and we created an instance of Azure Active Directory Services (AADDS) so we can use domain join/NTFS and other benefits we would get if we had synced an on premise domain via AD Connect.
We then deployed a host pool with a session host via the "create a host pool" wizard
If you missed that article or need a reference of what's been deployed or a refresher you can check the link out below!
switchitup.tech/setting-up-an-azure-virtual..
Other articles:
How to connect to Azure Virtual Desktop:
switchitup.tech/how-to-connect-to-azure-vir..
Lockdown AVD with Conditional Access
switchitup.tech/lockdown-avd-with-condition..
FSLogix Profile Containers
switchitup.tech/how-to-implement-fslogix-pr..
Introduction
This post looks at how we can create a gold image to maintain and use for our Azure Virtual Desktop Environment.
When we created our AVD lab we used a standard Windows 10 multi-session image pre-configured with Office 365. While this may suffice for a basic lab environment, what if we wanted to create and customize are own image, especially with applications used by our business? Then we need to customize our own image. There are a number of ways to do this:
Create a VM in Azure, install the required applications and updates then Sysprep and Capture the Image for use as a template to build VMs from.
Create a VM in Hyper-V on a local machine then download the image from Azure you wish to modify. Install the required applications and updates then Sysprep and upload the VHD into Azure.
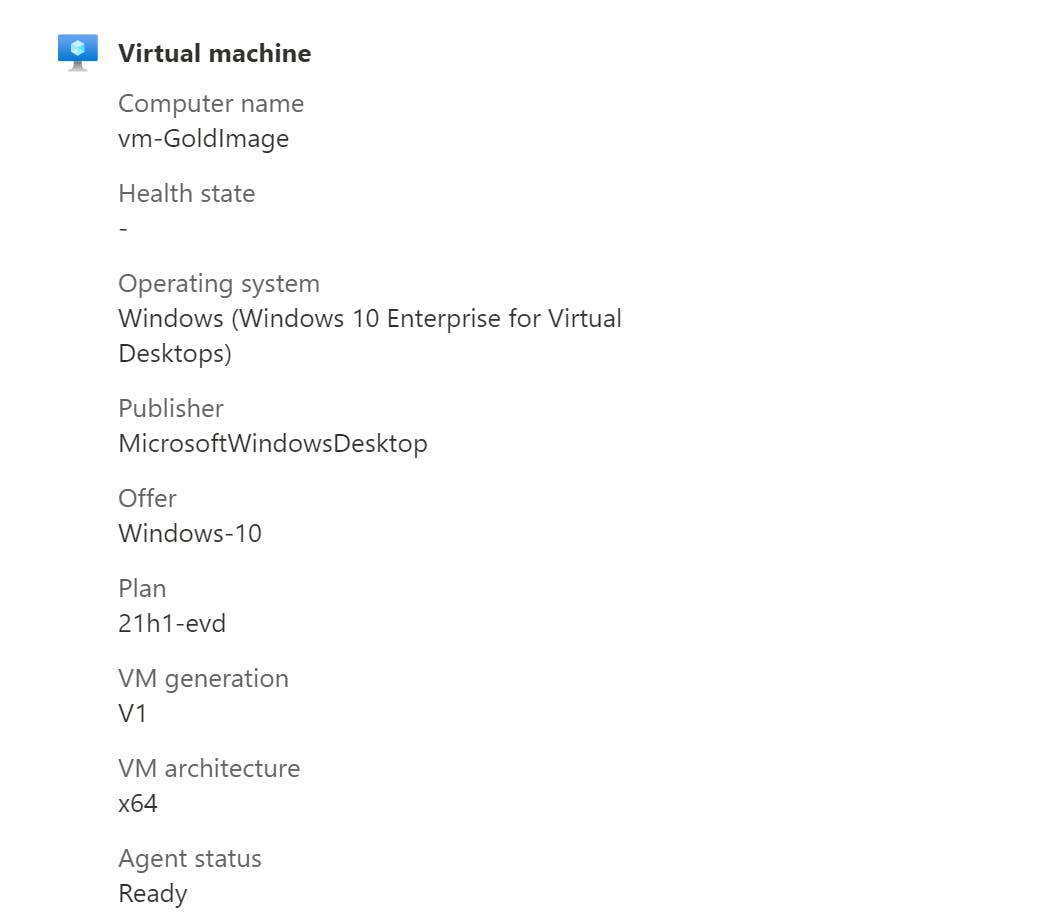
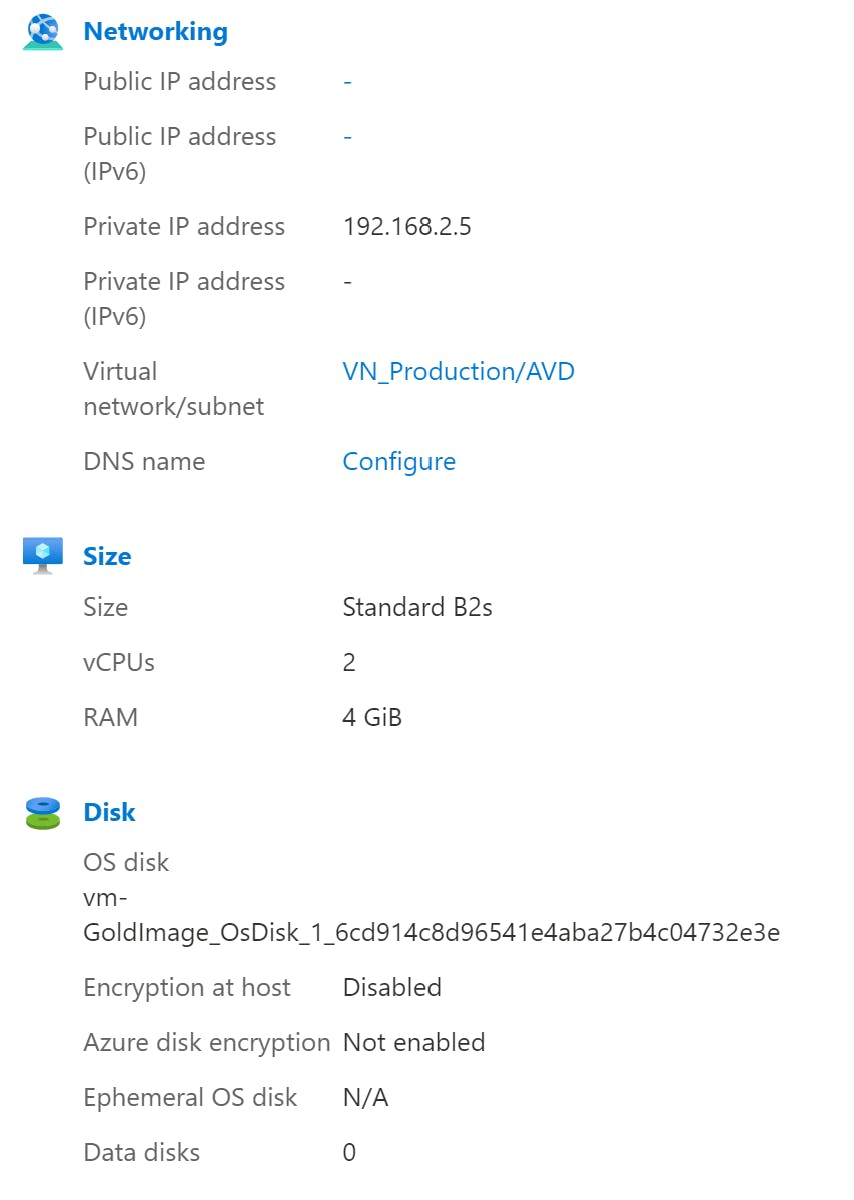
This post will cover scenario 1. I have built a basic VM in Azure, (see the specs below) then I have removed some junk apps that come pre-installed, installed a number of business apps required and updated the OS. Remember I am connecting to my VM via the Bastion Subnet no public IP required on the VM.
as a side note DO NOT domain join this VM, and it must not already be a member of an AVD host pool, or this will cause serious headaches!
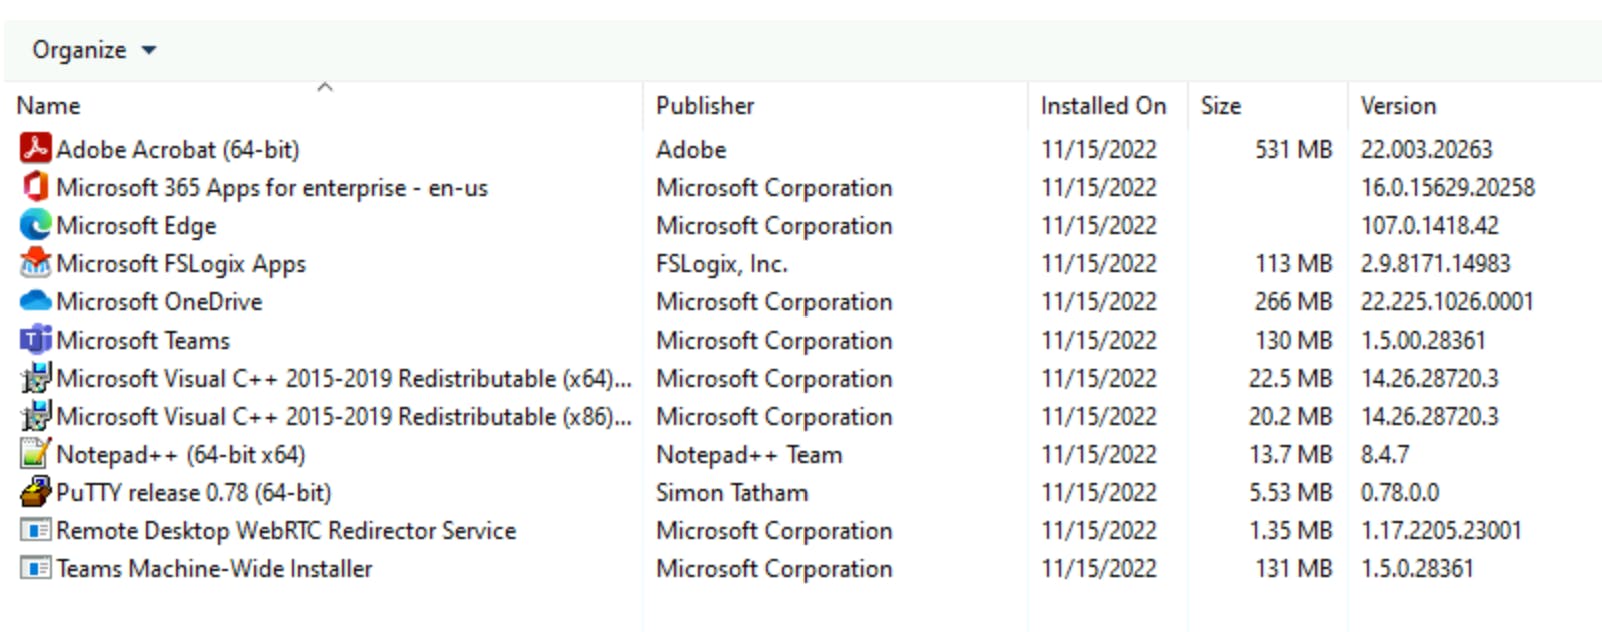
Applications Installed:
- Office 365 (Shared Computer Activation Mode)
- Teams (Per Machine Mode)
- Onedrive (Per Machine Mode)
- notepad++
- Putty
- Adobe Acrobat Reader DC
- Remote Desktop WEBRTC
Applications Removed:
- Xbox Gamebar
- Solitaire
- Skype
We will walk through the setup of Office 365/OneDrive/Teams ready for AVD environment. We will then Sysprep and capture the image.
Office365 Shared Computer Activation Mode
To deploy Office365 correctly for the AVD environment we need to download the "Office Deployment Toolkit" to our VM. We then need to create an configuration.xml file that will have the required parameters for installation.
Firstly, download the toolkit run and extract to a folder (I have created "Office Deployment Tool" directory under C:\
microsoft.com/en-us/download/details.aspx?i..
copy the xml configuration below into a notepad file and save it as "Configuration.xml" save this in the same directory you extracted the toolkit to.
<Configuration>
  <Add OfficeClientEdition="64" Channel="MonthlyEnterprise">
    <Product ID="O365ProPlusRetail">
      <Language ID="en-US" />
      <Language ID="MatchOS" />
      <ExcludeApp ID="Groove" />
      <ExcludeApp ID="Lync" />
      <ExcludeApp ID="OneDrive" />
      <ExcludeApp ID="Teams" />
    </Product>
  </Add>
  <RemoveMSI/>
  <Updates Enabled="FALSE"/>
  <Display Level="None" AcceptEULA="TRUE" />
  <Logging Level="Standard" Path="%temp%\WVDOfficeInstall" />
  <Property Name="FORCEAPPSHUTDOWN" Value="TRUE"/>
  <Property Name="SharedComputerLicensing" Value="1"/>
</Configuration>
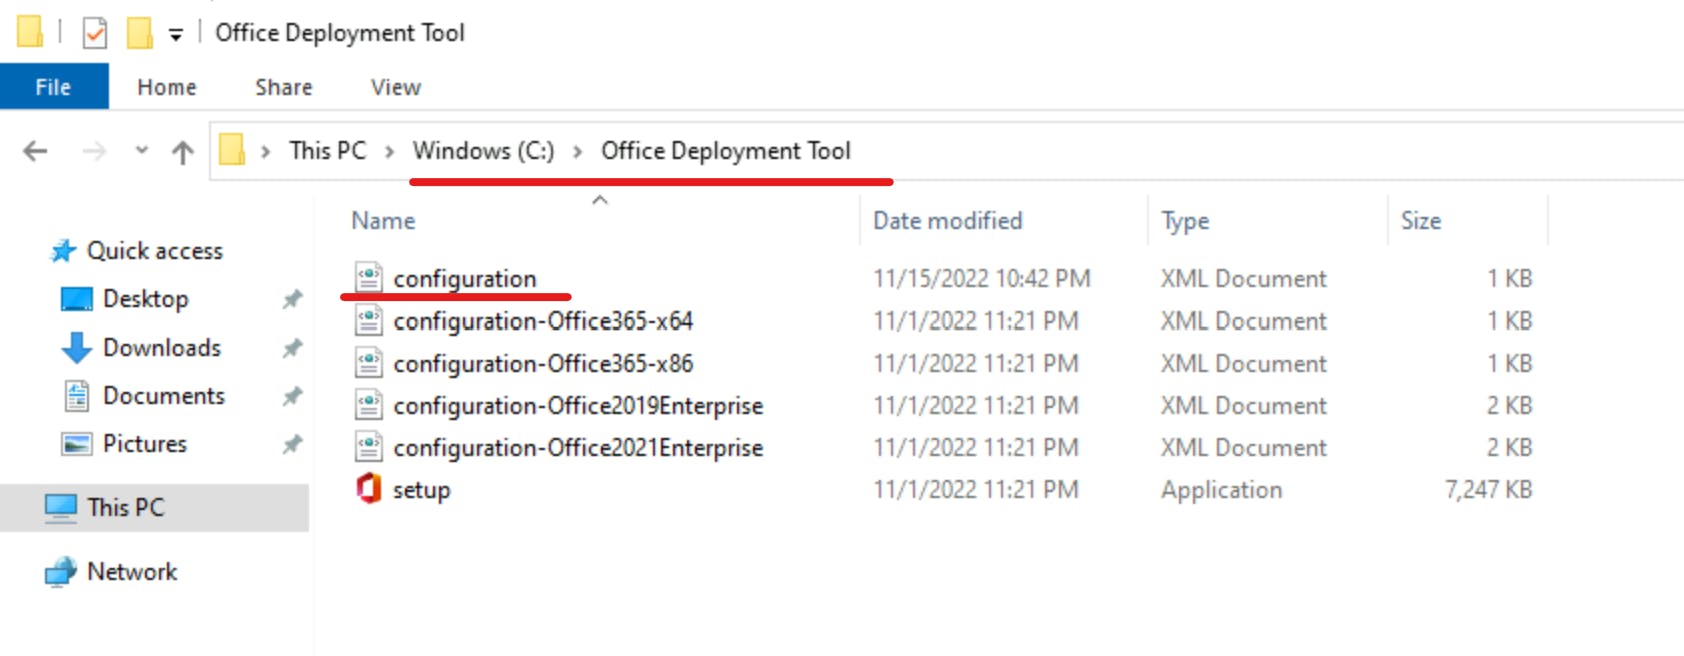
The configuration XML provided will do the following things:
- Install Office from the Monthly Enterprise Channel and deliver updates from the Monthly Enterprise Channel.
- Use the x64 architecture.
- Disable automatic updates.
- Remove any existing installations of Office and migrate their settings.
- Enable shared computer activation.
Finally run the following from CMD to install office365:
cd C:\Office Deployment Toolkit\
Setup.exe /configure configuration.xml
This will silently install the Office365 applications.
OneDrive Per-Machine Mode
Create a folder called "OneDrive Deployment" under C:\, download and save the OneDrive file to this location

Run the following command to uninstall any prior version of OneDrive:
"C:\Onedrive Deployment\OneDriveSetup.exe" /uninstall
Set the following reg key to "AllUsersInstall":
REG ADD "HKLM\Software\Microsoft\OneDrive" /v "AllUsersInstall" /t REG_DWORD /d 1 /reg:64
Run to install in per-machine mode:
C:\Onedrive Deployment\OneDriveSetup.exe /allusers
Set to start at sign-in for all users:
REG ADD "HKLM\Software\Microsoft\Windows\CurrentVersion\Run" /v OneDrive /t REG_SZ /d "C:\Program Files (x86)\Microsoft OneDrive\OneDrive.exe /background" /f
Enable silently configure user account:
REG ADD "HKLM\SOFTWARE\Policies\Microsoft\OneDrive" /v "SilentAccountConfig" /t REG_DWORD /d 1 /f
Redirect known folders to OneDrive:
REG ADD "HKLM\SOFTWARE\Policies\Microsoft\OneDrive" /v "KFMSilentOptIn" /t REG_SZ /d "<your-AzureAdTenantId>" /f
Teams Per-machine Setup
For Teams we must first enable "isWVDEnvironment" Registry Key in PowerShell:
New-Item -Path "HKLM:\SOFTWARE\Microsoft\Teams" -Force
New-ItemProperty -Path "HKLM:\SOFTWARE\Microsoft\Teams" -Name IsWVDEnvironment -PropertyType DWORD -Value 1 -Force
The Remote Desktop WebRTC Redirector Service is required to run Teams on Azure Virtual Desktop. This is found here:
aka.ms/msrdcwebrtcsvc/msi
Simple run, next and finish installation.
Finally, we can install Teams, because our AVD lab is a pooled scenario we need to install Teams on per-machine mode which installs teams to the program files folder.
If you have persistent desktops, you will need to install per-user which will put teams in the app data folder
Download the teams MSI in required format (32 or 64) we have gone with recommended 64bit:
learn.microsoft.com/en-us/microsoftteams/te..
I have saved my MSI in a directory called "Teams Deployment" on c:\:
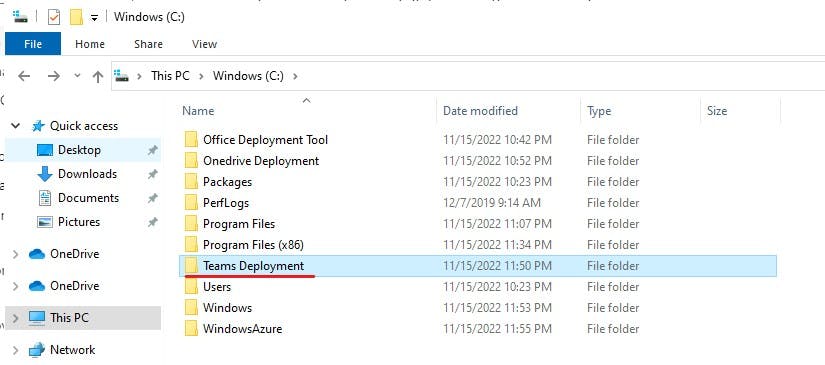
cd C:\Teams Deployment
msiexec /i Teams_windows_x64 /l*v ALLUSER=1 ALLUSERS=1
You should see the MSI package initialize. It will then install silently. It took a reboot for Teams to appear on my VM.
Misc Tasks
- Uninstall your unwanted Programs
- Install other applications
- Install FSLogix (Non-Multi-session Images)
- Configure FSLogix Profile container settings (see my other post in this series):
switchitup.tech/how-to-implement-fslogix-pr.. - Disable Automatic Updates (Recommended for AVD):
New-ItemProperty -Path "HKLM:\SOFTWARE\Policies\Microsoft\Windows\WindowsUpdate\AU" -Name NoAutoUpdate -PropertyType DWORD -Value 1 -Force
- Allow Time Zone Redirection
New-ItemProperty -Path "HKLM:\SOFTWARE\Policies\Microsoft\Windows NT\Terminal Services" -Name fEnableTimeZoneRedirection -PropertyType DWORD -Value 1 -Force
- Disable Storage sense (Recommended for AVD):
New-ItemProperty -Path "HKLM:\SOFTWARE\Microsoft\Windows\CurrentVersion\StorageSense\Parameters\StoragePolicy" -Name 01 -PropertyType DWORD -Value 0 -Force
Create a VM Snapshot
It is important you create a snapshot before you are ready to Sysprep your machine as once you Capture your image this renders the VM useless, and you won't be able to boot back into your image, it also gives you a point to roll back should something go wrong with the Sysprep process. You will need to create a new disk from the snapshot to update the image or make changes. To create a disk snapshot, navigate to:
Virtual Machines > Virtual Machine Name > Disks > select required disk > +Snapshot

Sysprep
Before you can deploy a Windows image to new PCs, you have to first generalize the image. Generalizing the image removes computer-specific information such as installed drivers and the computer security identifier (SID).
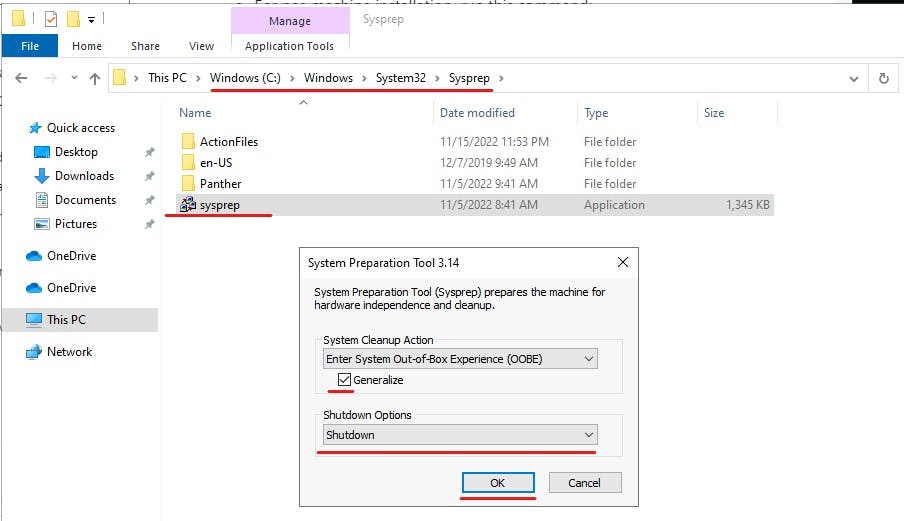
Sysprep is located in the System32 Directory:
c:\Windows\System32\Sysprep\sysprep.exe
Run Sysprep and we are going to tick "generalize" then on the bottom drop down select Shutdown. This will shut down your VM, make sure all your customizations have been made to the image.
Capture the Image
Now the machine has turned off and our image is Syspreped we can capture the image via the Azure portal. Navigate to your Virtual Machine you just customized your image on select "Capture" on the navigation bar:

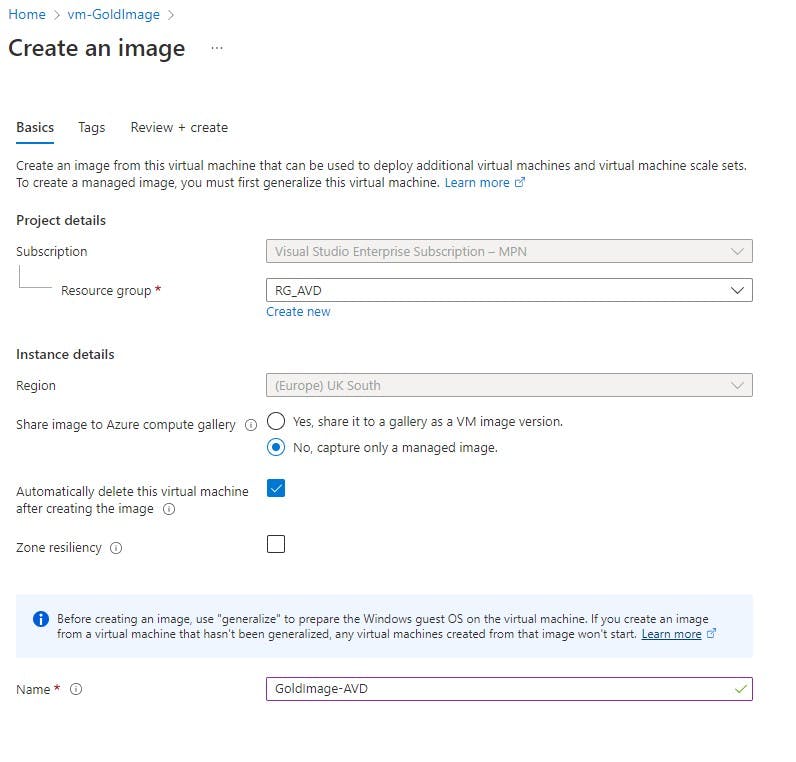
Once you capture the image the VM is not needed and can't be used so this can be deleted to free up resource and cost via ticking the box "Automatically delete this VM on image creation"
After Azure has confirmed your deployment is a success navigate to the Resource Group you saved the image to, and you will see the image resource:
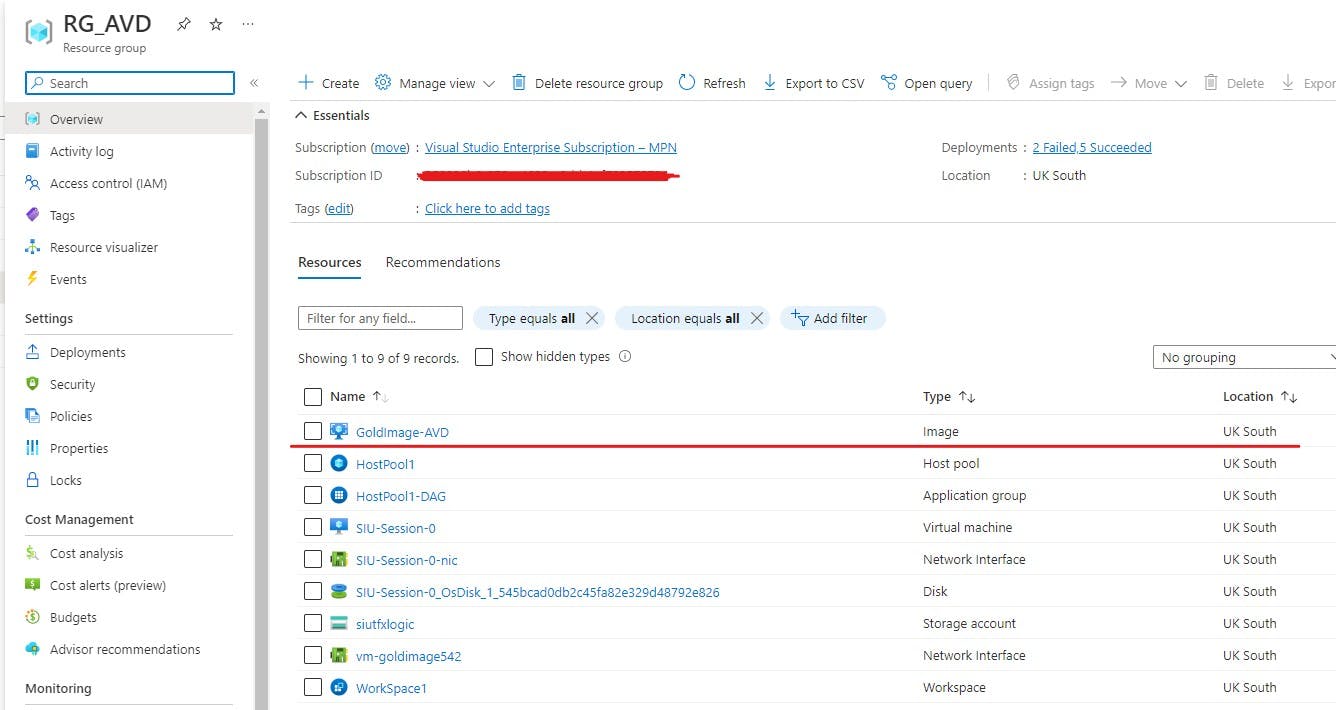
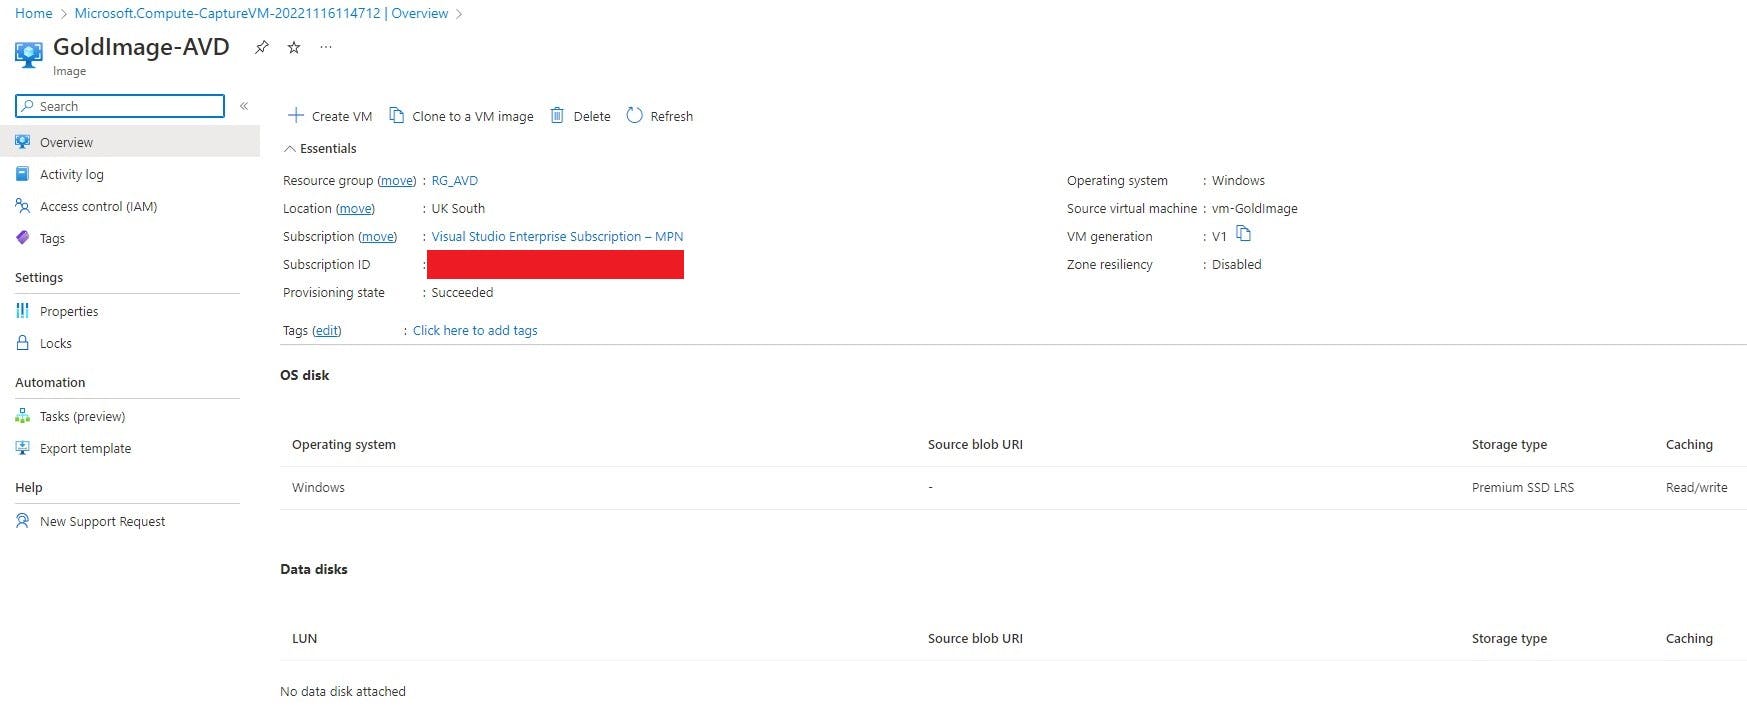
Drill into the image to discover all the details:
Summary
Congratulations we have configured a custom image we can use in our AVD environment as a gold image. Next post we will look at how to upgrade our session hosts to use our new Image.
