Introduction
This article will show you how to quickly create a simple Point-to-site VPN in Azure using OpenVPN (SSL) that authenticates your users against your Azure Active Directory Tenant. You will then verify the session.
What is Point-to-Site VPN?
Point-to-Site is used to Connect your remote workers from outside your business network to your Azure Corporate cloud resources. You can extend connectivity to on-premise but this then requires you to set up a Site-to-Site VPN between Azure and on-premise.
Tunnel Types:
Several Point-to-site tunnel types exist each fitting different scenarios:
SSTP - Can bypass most firewalls as uses HTTPS (443) - Windows Client only
OpenVPN - Works on TLS - Broader OS support (Android/IOS/Windows/MAC/Linux)
IKEv2 - IPSec VPN
Authentication Types:
The tunnel type you choose has a bearing on the user Authentication settings you can choose:
Azure AD - OpenVPN
Certificate - OpenVPN, SSTP, IKEv2
RADIUS - OpenVPN, IKEv2, SSTP
Your RADIUS server can be on-premise OR in the cloud. For on-premise RADIUS you will need a Site-to-Site VPN between your cloud and on-premise gateway endpoints.
TIP - OpenVPN is the only type that allows you to pick multiple authentication types.
LAB Setup
This lab presumes you have a subscription in place and a Global Administrator user to configure the requirements in Azure. I WIll skip the creation of the VNET.
1x Existing Azure AD Tenant
1x Vnet
1x VPN gateway
1x Public IP
1x Point-to-Site Configuration
1x Windows Client (8.1/10/11)
VNET:
\Note - When creating subnets don't worry about the GatewaySubnet, this will be deployed when we set up the VPN gateway.*
| Name | VN_Production |
| Region | UK_South |
| IP Address Range | 192.168.10.0/24 |
| Subnet (production) | 192.168.10.1-127 (/25) |
| GatewaySubnet* | 192.168.10.128/27 |
VPN Gateway:
| Name | GW_Prod |
| Region | UK_South |
| Gateway Type | VPN |
| VPN Type | Route Based |
| SKU | VpnGw1 |
| Generation | 1 |
| Virtual Network | VN_Production |
Public IP:
Note - This will be created during the VPN Gateway creation wizard
| Name | PIP_Prod |
| Region | UK_South |
| SKU | Standard |
| Assignment | Static |
| Availability Zone | 1 |
| Enable Active-Active | Disabled |
| Configure BGP | Disabled |
Point-to-Site Configuration:
| Address Pool | 192.168.20.0/24 |
| Tunnel Type | OPENVPN (SSL) |
| Authentication Type | Azure Active Directory |
| Tenant: | https://login.microsoftonline.com/<tenant ID> |
| Audience (Public) | 41b23e61-6c1e-4545-b367-cd054e0ed4b4 |
| Issuer | https://sts.windows.net/<tenant ID>/ |
VPN Gateway Configuration:
In Azure Portal navigate to "Virtual Network Gateways" and select "Create" to start the wizard seen below:
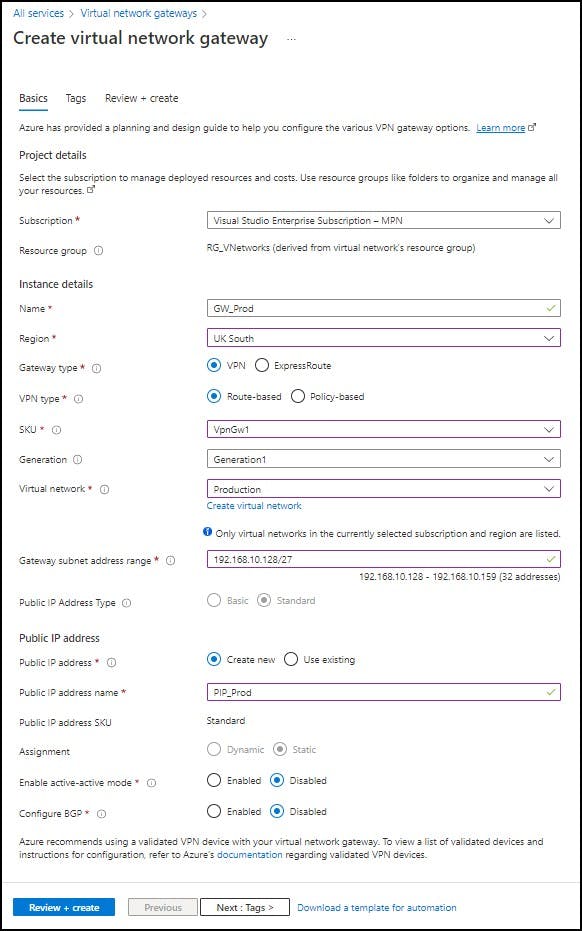
Once you have entered all required details based on the above tables we will "Review + Create". This can take up to 20-30mins so be patient, you can view progress changes from the notifications panel or stick on the deployment progress screen:

Point-to-Site configuration:
Once your VPN Gateway has deployed we can go into it and see "Point-to-Site Configuration" on the left-hand navigation panel. select this and we will configure the point-to-site settings, click "Configure Now":
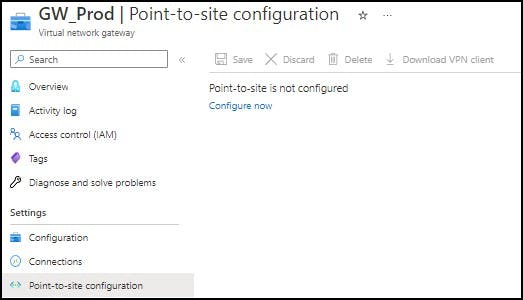
Enter the details based on the above tables into the wizard:
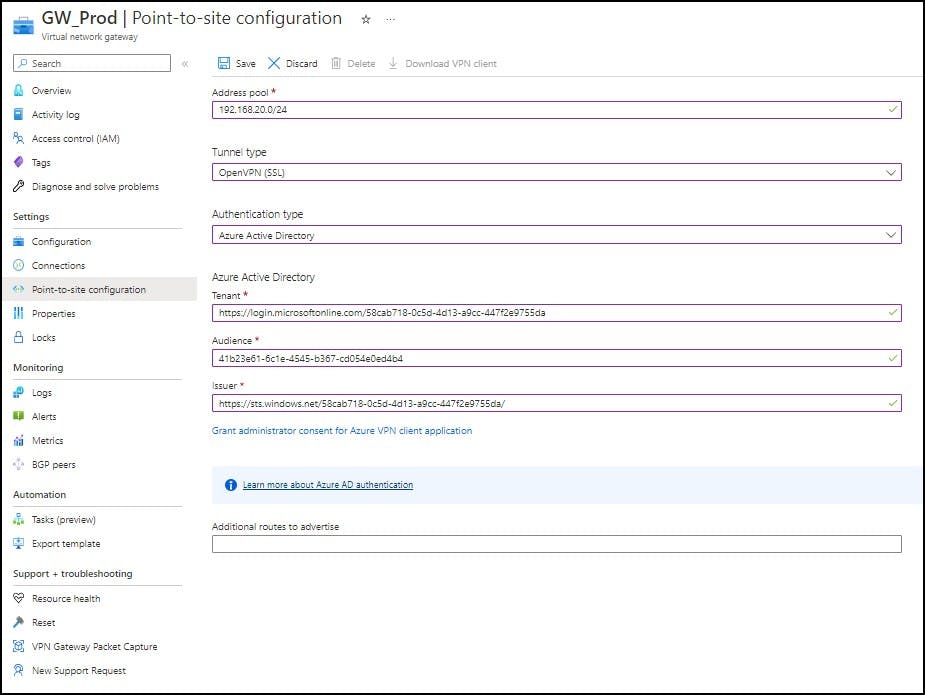
Save the settings once completed and wait for this to complete deployment (a few mins) on completion click on the "Grant administrator consent for Azure VPN Client Application" link.

This will bring a pop-up box that requires you to grant access to the OpenVPN Enterprise application to access your Azure tenant, as this will be using Azure AD to authenticate your user's access:
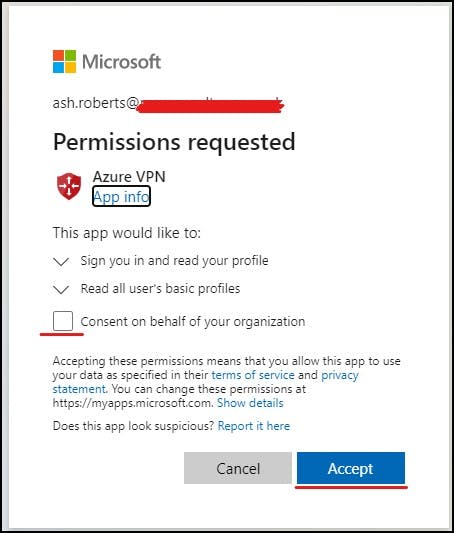
return to your "point-to-site configuration" page and you will see the "Download VPN client" button on the top navigation bar. This is sort of misleading as it is not the client but the client settings XML you need to import to the Windows Azure VPN client application. Download and save to your test device we will return to this soon.

Client Setup
On your Windows client Navigate to the following Link to download the Azure VPN client. (the built-in Windows client will not work) .
https://apps.microsoft.com/store/detail/azure-vpn-client/9NP355QT2SQB?hl=en-gb&gl=gb&rtc=1

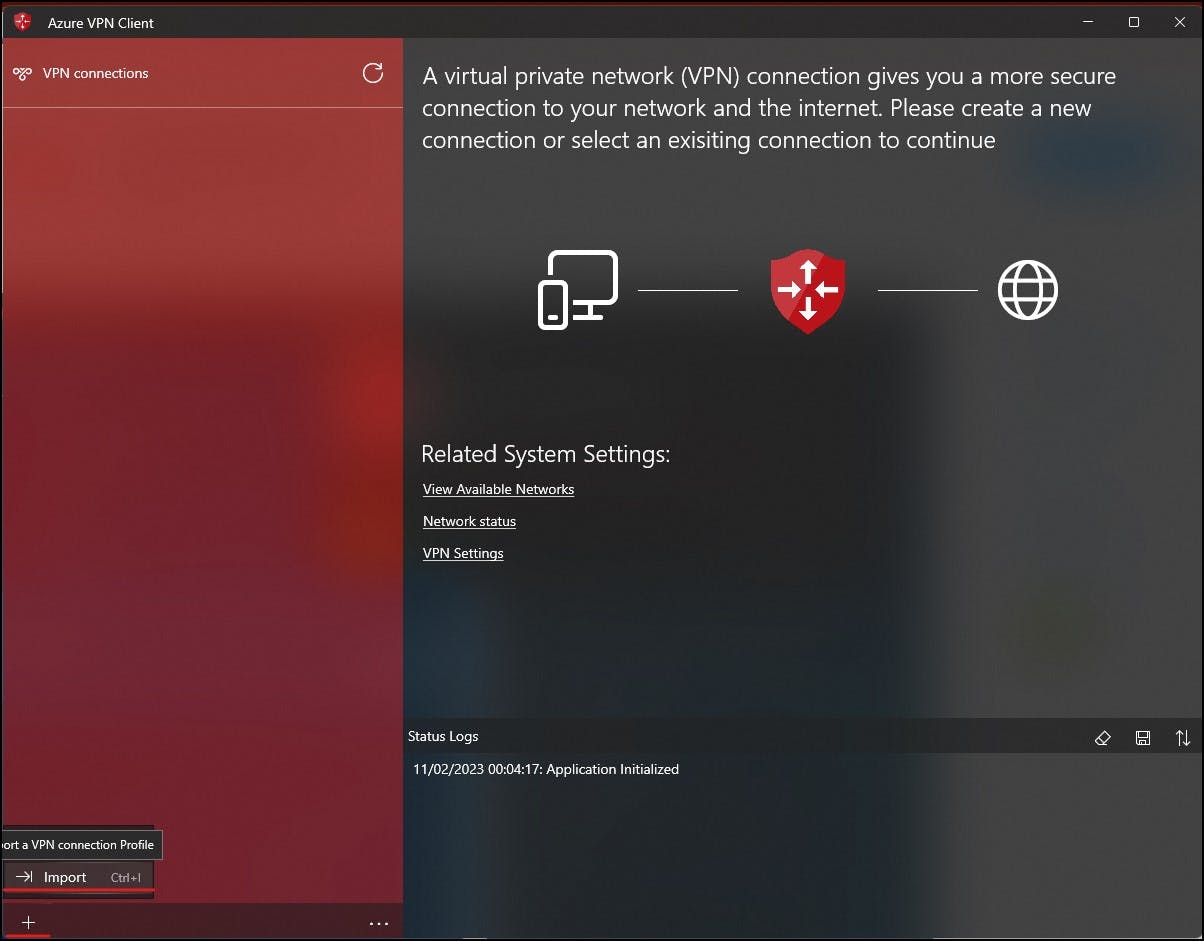
Once you have installed the Azure VPN Client, open it up and we will Import the configuration XML we downloaded earlier by clicking on the "+" icon in the bottom left. Make sure you have extracted the XML from the ZIP file
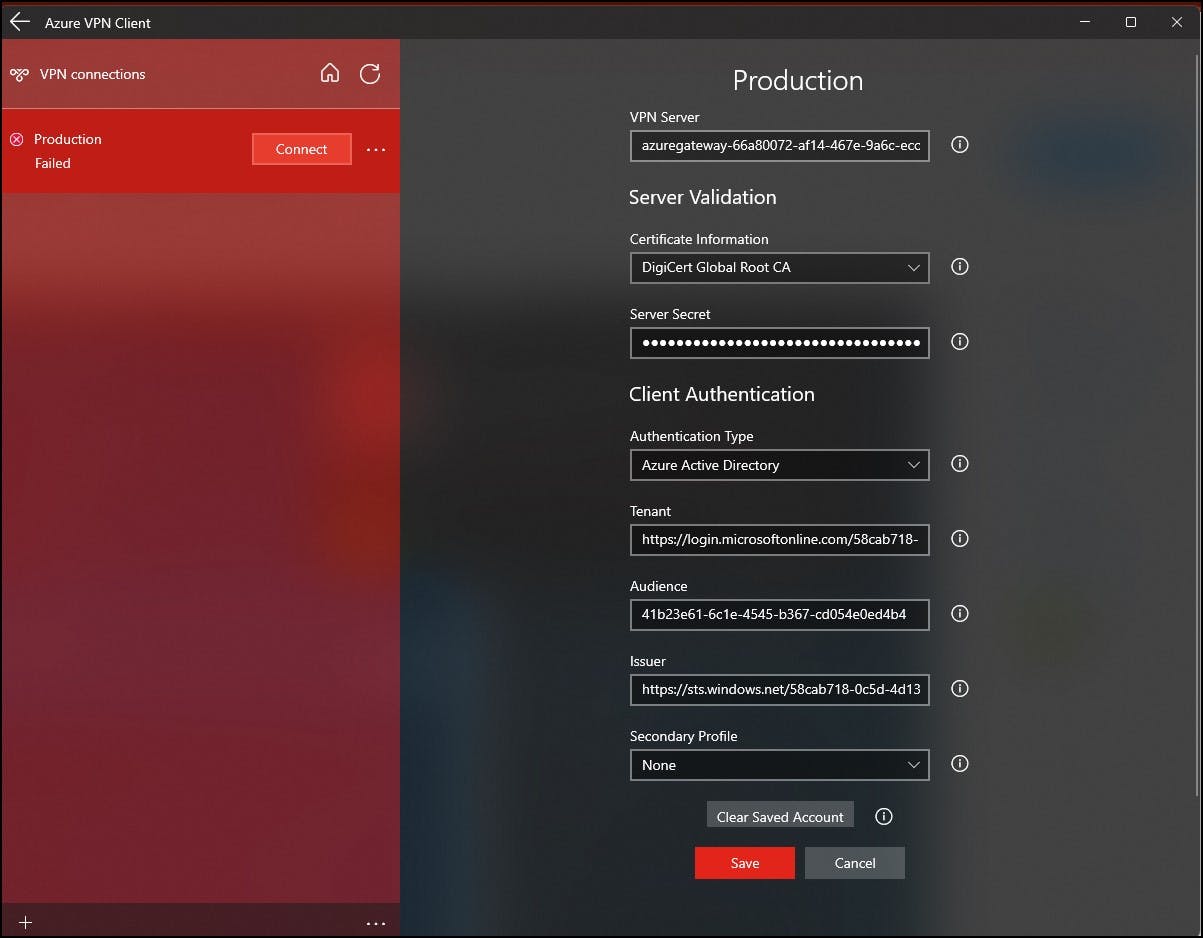
Once you have imported the XML all your settings for the point-to-site connection should appear in the client.
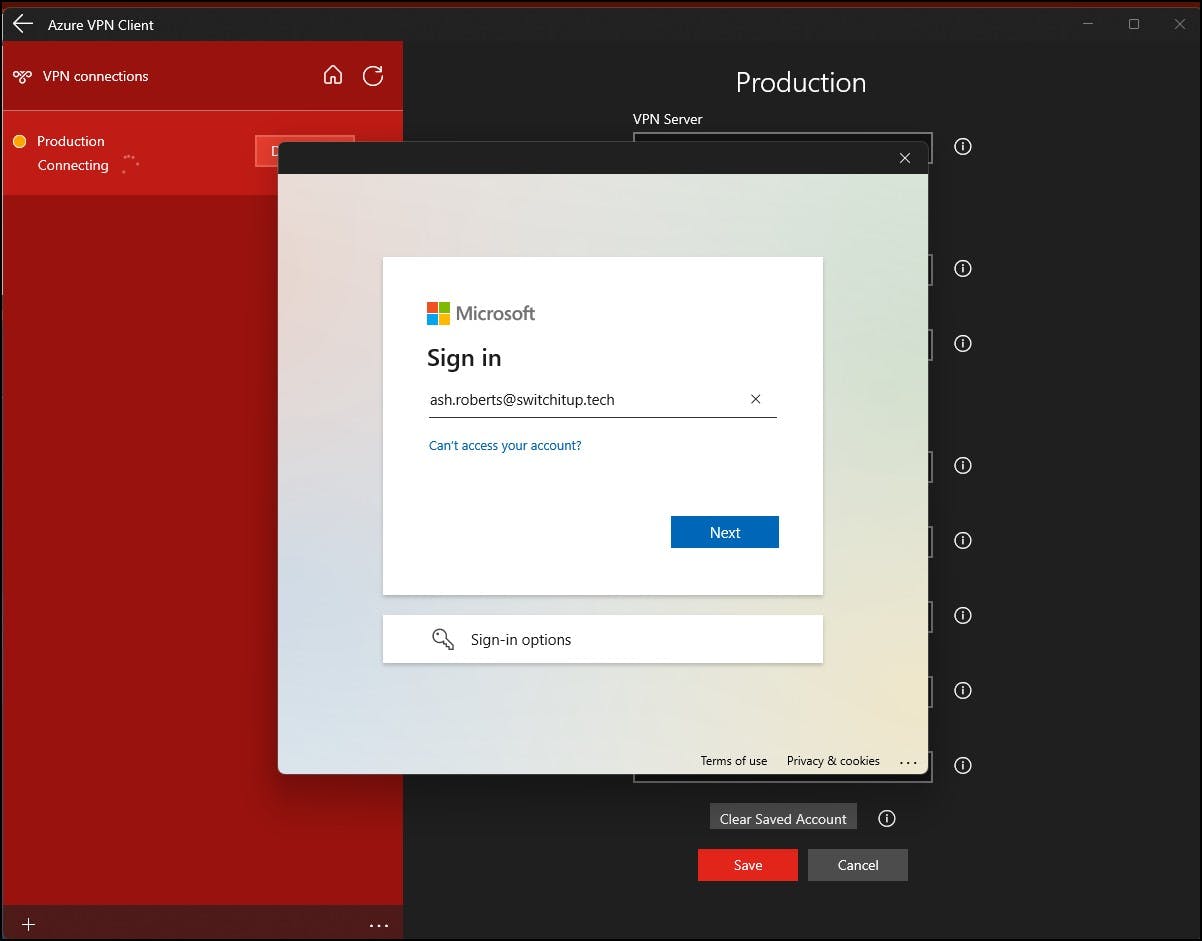
Click connect on the left panel and you will be prompted to log into your work/school account to authenticate against Azure AD tenant.
All being well, you should get a green light and the status "Connected"
Verification
Navigate back to your VPN gateway in the Azure Portal. On the left-hand navigation pane, you will see "Point-to-Site Sessions". Click on this to view your current client connection.

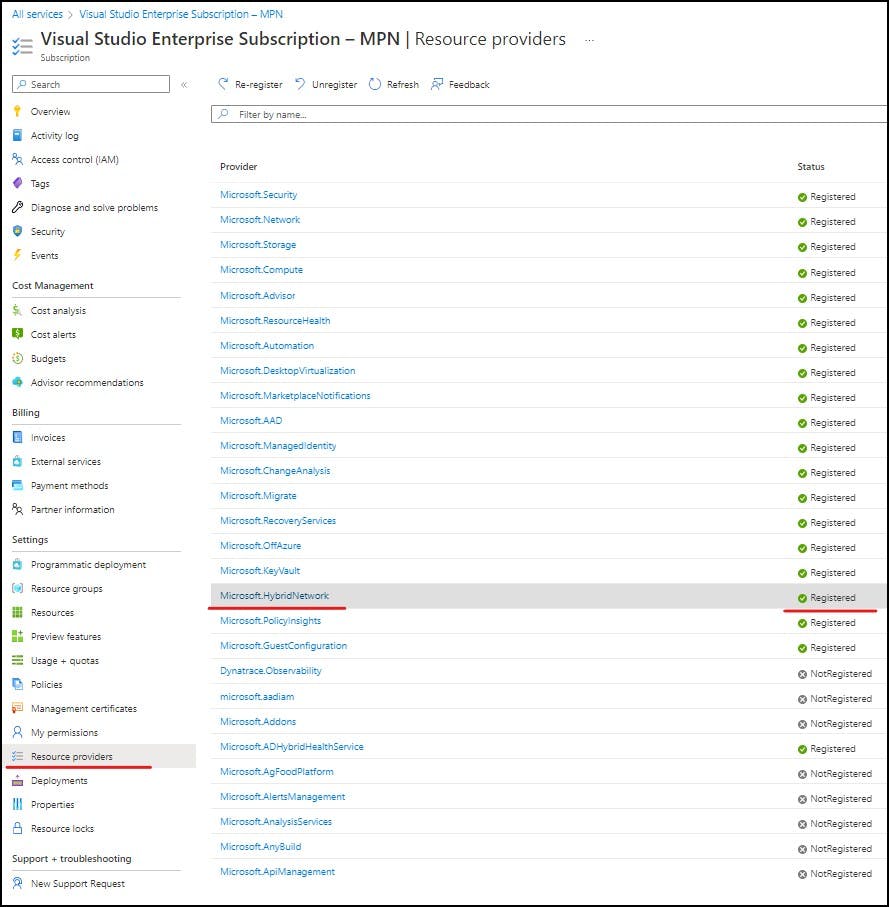
If for some reason this does not load or fails you may need to navigate to your Subscription > Resource providers and make sure Microsoft.HybridNetwork is registered.
Summary
Congratulations, you have learnt how to set up a basic Point-to-Site VPN that uses OpenVPN and Azure AD authentication to allow your Remote workers access to your cloud environment.
If you found this informative please like and consider following to stay up-to-date with my latest content
