Welcome to another blog article in my AZ-104 training series. This time round we are going to focus on Azure File Sync. This will cover the following Exam Objective Points:
Create and configure Azure File Sync Service
Create an Azure File Share
What is Azure File Sync?
Azure file sync allows you to store your file shares or volumes in Azure files while keeping the flexibility of an on-premise file server.
This comes with a number of benefits:
- File Archiving = Recently accessed files are kept on premise (also known as cloud tiering and is optional)
- Flexibility to add new branch offices into Azure and share files across the business
- Backup and disaster recovery with Azure Backup of entire shares or individual files.
Azure File Sync Components
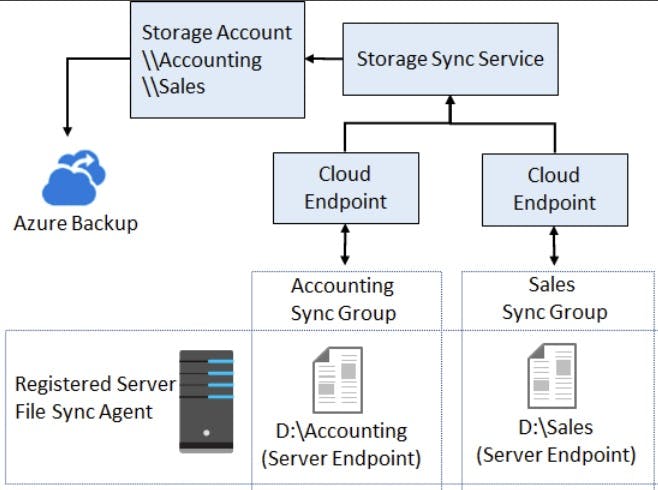
There are a number of key components that make up File Sync Service:
- Storage Sync Service - top level resource required for Azure File Sync
- Sync Group - Endpoint points within a sync group are kept in sync with each other
- Registered Server - The server a trust relationship is created between itself and the Azure File Syn Service
- File Sync Agent - Installed on the registered server to link Windows Server to Azure Files
- Server Endpoint - Endpoint on the registered server referencing a specific folder/volume location
- Cloud Endpoint - An Azure File share.
The following Picture shows the relationship between all the components above:
Deployment Process
EXAM TIP!
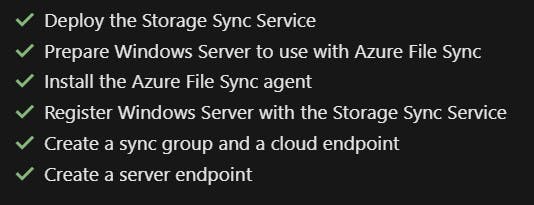
Pay attention to the high level steps required you will be tested on these and maybe asked to order them.

Lets walk through each of these in turn to give a better understanding of the process:
Deploy Storage Sync Service
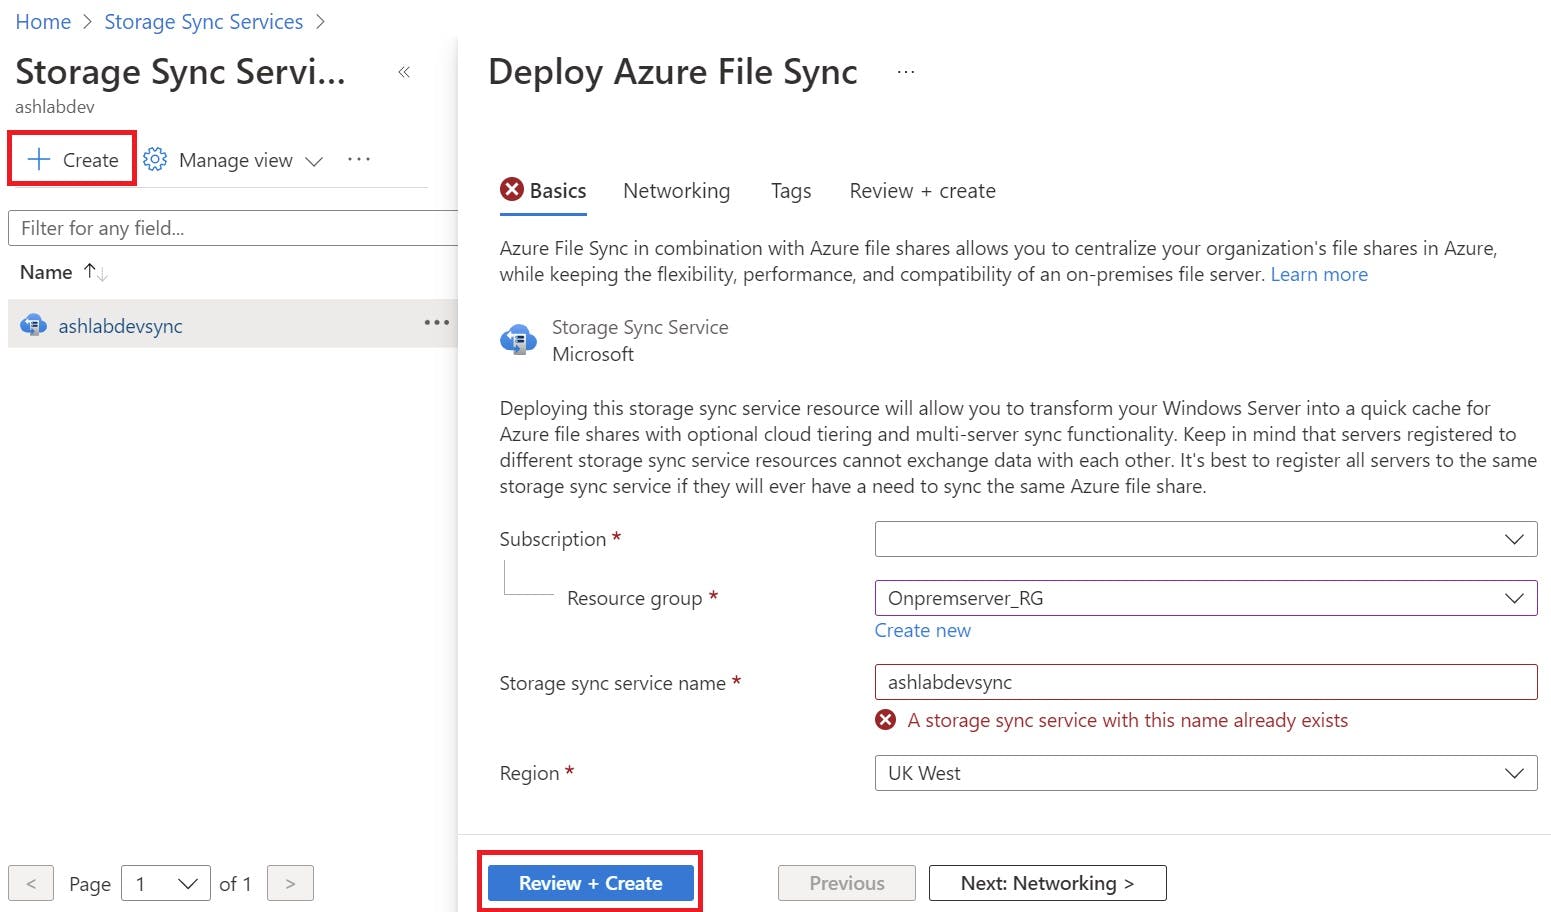
Log into Azure Portal and search "Storage" in the top search bar and select "Storage Sync Service"

On the Storage Sync Service Page select Create, provide your Subscription, resource group, rename your sync service and select region. Click review+Create.
Prepare Windows Server
You will need to make sure you turn off IE enhanced protection, and install the latest AZ PowerShell module. You can also check the supported server matrix for Azure File Sync support:


Install File Sync Agent
You need to install the file sync agent on the server you plan to hook into Azure File Sync. If you have a cluster you need to install and register each node in the cluster with Azure File Sync! You can get to the agent download link from the "Register Server" section in the Storage Sync Service.

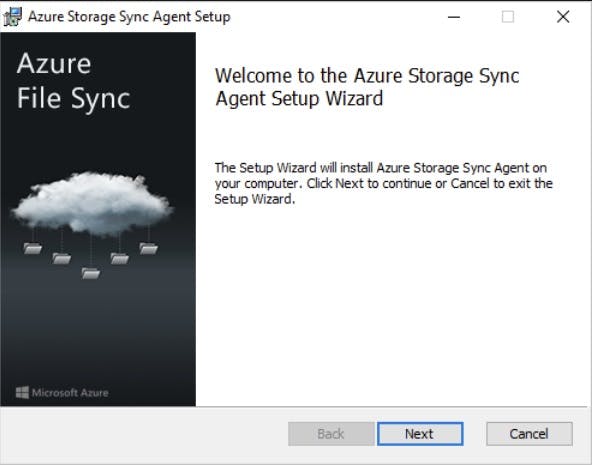
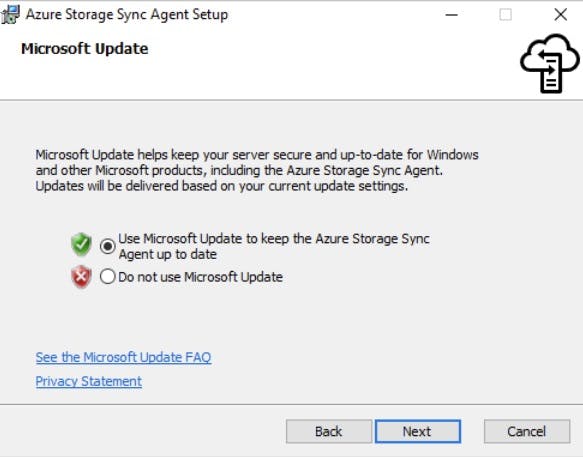
Register the Windows Server
After installing the agent you are presented with a number of registration pages to hook your server into your Azure tenant. you will need:
Azure Subscription
Resource group your Storage Sync Service resource sits
Actual Storage Sync Service resource
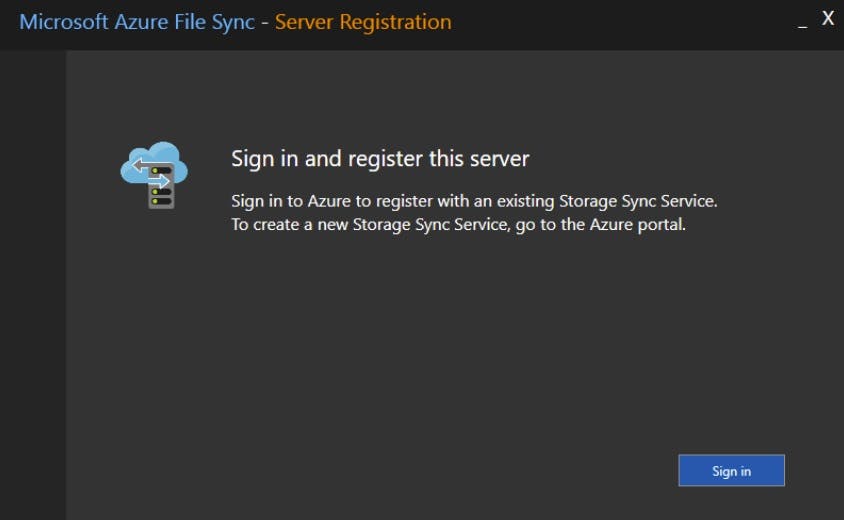
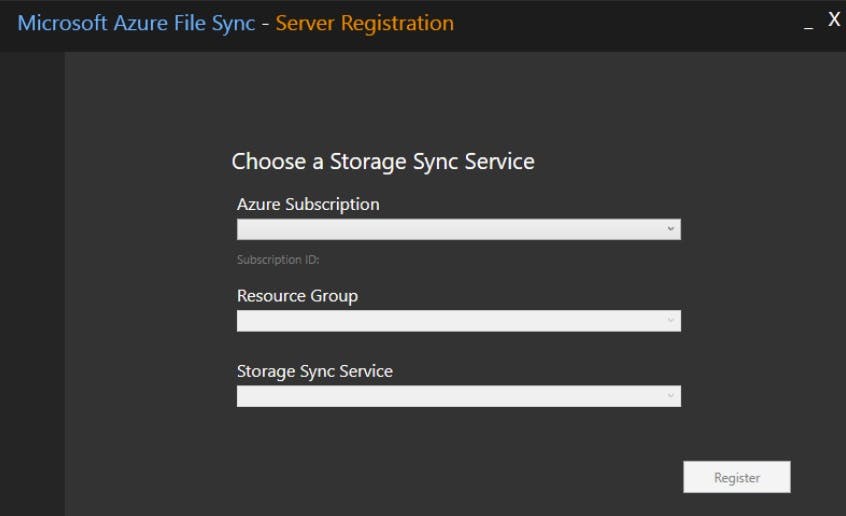
You will then be asked to sign into your Azure tenant to finalize the process. Once the server is registered you should see it under "Register Server" section of the Storage Sync Service as online.

We will now move on to creating a sync group with cloud and server endpoints to locations of our files we want to sync. Before this I will briefly discuss my File server configuration.
File Server Configuration
I currently have a File Server (FS) running in Hyper-V (Server 2022). I have two 10gb disks one named StudentData and a second named TeacherData. (Simulating a School scenario)

Important tips:
You can't change drive letters for server endpoints once established
Server endpoint must be a verified path not mounted share or NAS
System volumes can't use Cloud Tiering
Before we create our Server endpoints we need cloud endpoints so we can tie the two together. Cloud endpoints are Azure File Shares, we can create these in a Storage Account.
EXAM TIP!
You can have multiple server endpoints linked to a single cloud endpoints.
An Azure File Share can only be a member of a single cloud endpoint
Storage Account & File Share Creation
Few things to note about Azure File Shares
- Standard shares = HDD
- Premium Shares = SSD
EXAM TIP!
The below table matrix shows the redundancy available for File Share types you may be tested on these:

Search "Storage" in the Azure Search bar and select Storage Account. Then Create.
The following will create premium Storage Account for Azure Files with local redundancy:
I will cover Storage Accounts in more intricate details in another lesson for now this should be enough to get going.
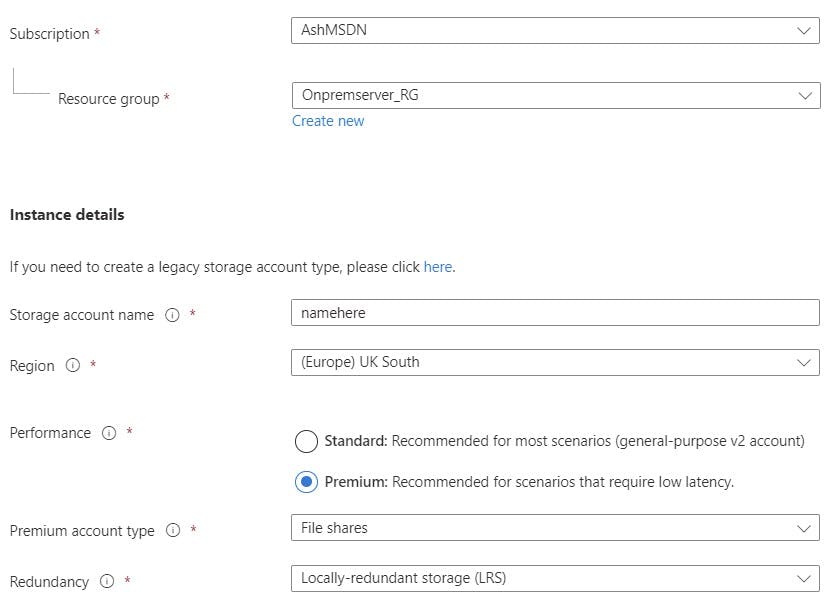
You may also want to select "Enable Large File Shares" in Advanced if you have file shares over 100TB:

Now with our Storage Account created we can create Azure File Shares (Cloud Endpoints):
In our Storage Account select FileShares on the left navigation bar, then create:
I have created two already Student and Teacher
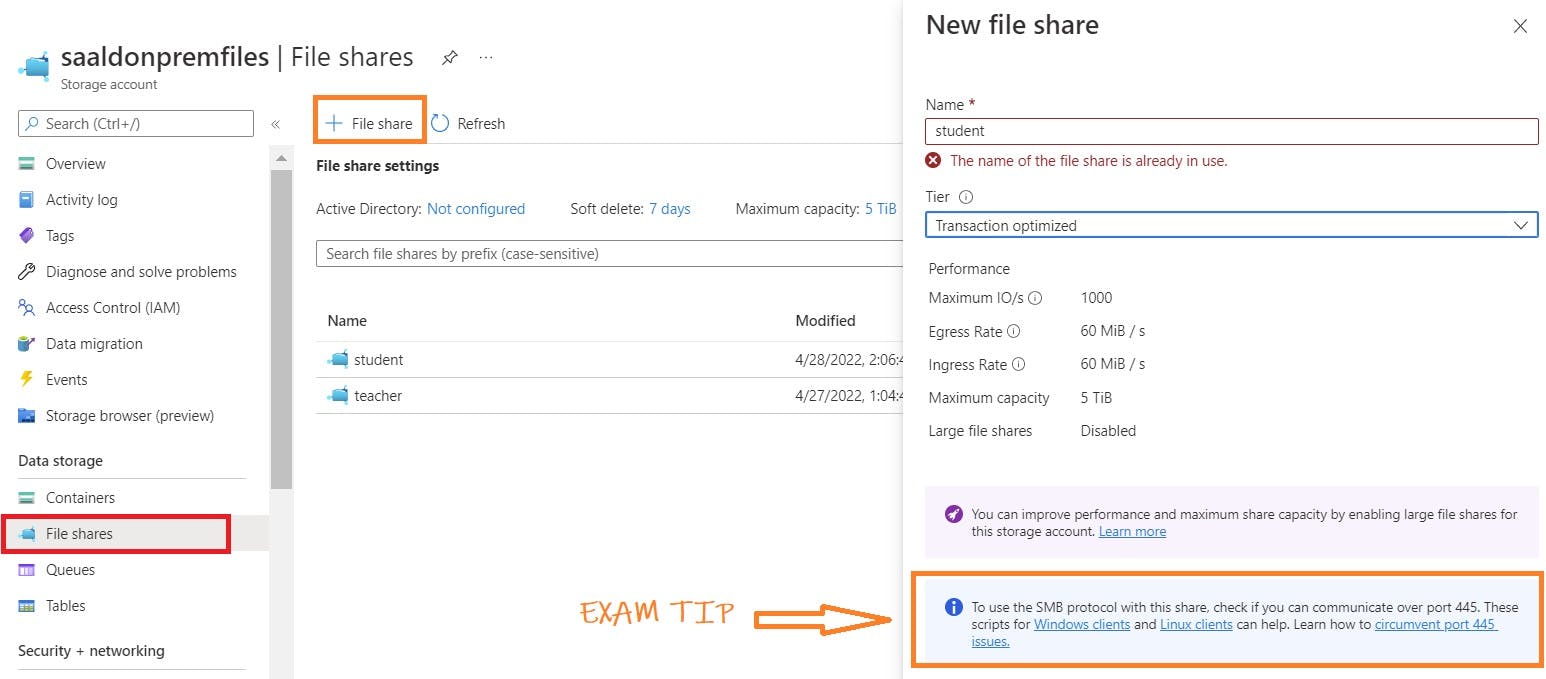
We can now create our Sync group back under Storage Sync Service
Create Sync Groups

When creating a group you will need to reference the Storage Account you created the File Shares, Then select the file share you want as the cloud endpoint
I'm obviously creating both Student and Teacher Sync Groups.
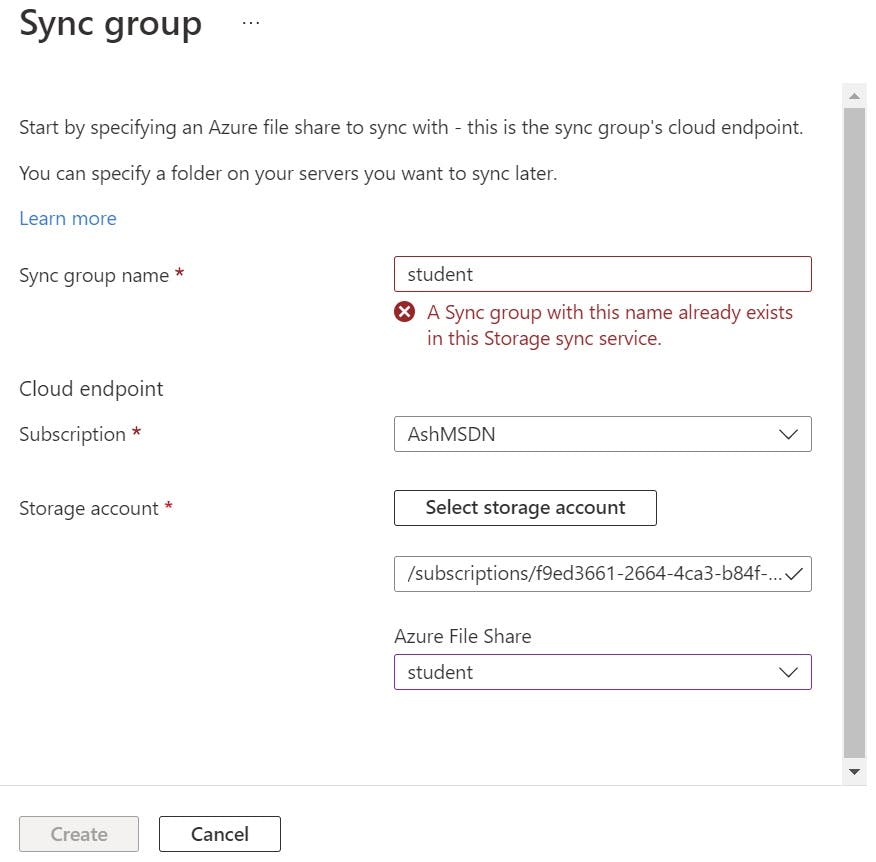
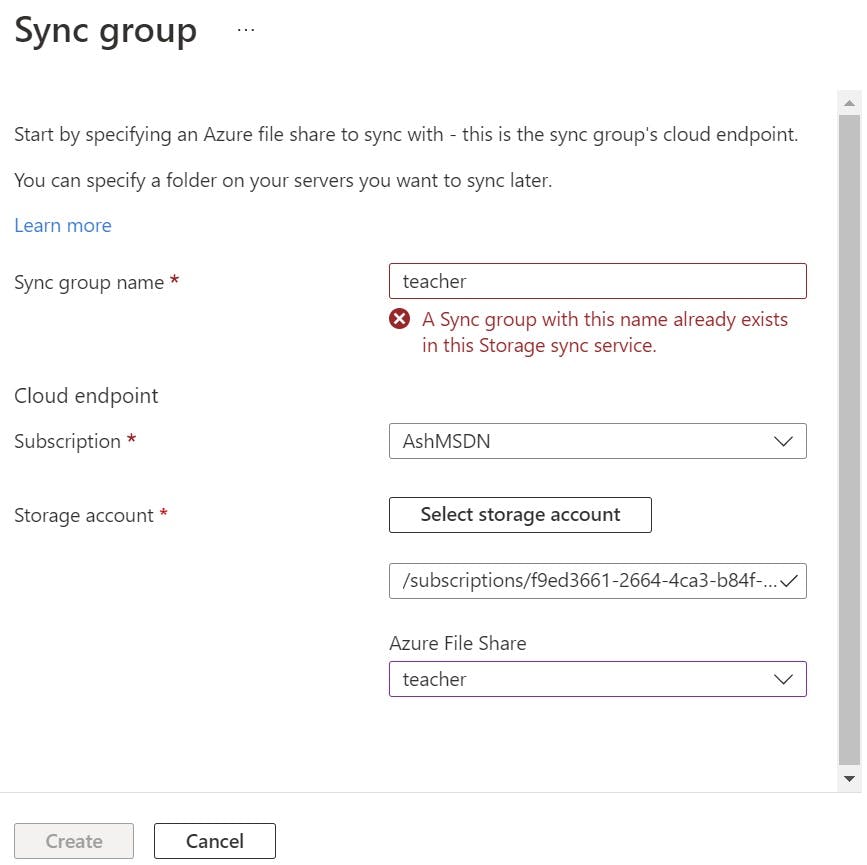

Server Endpoint Creation
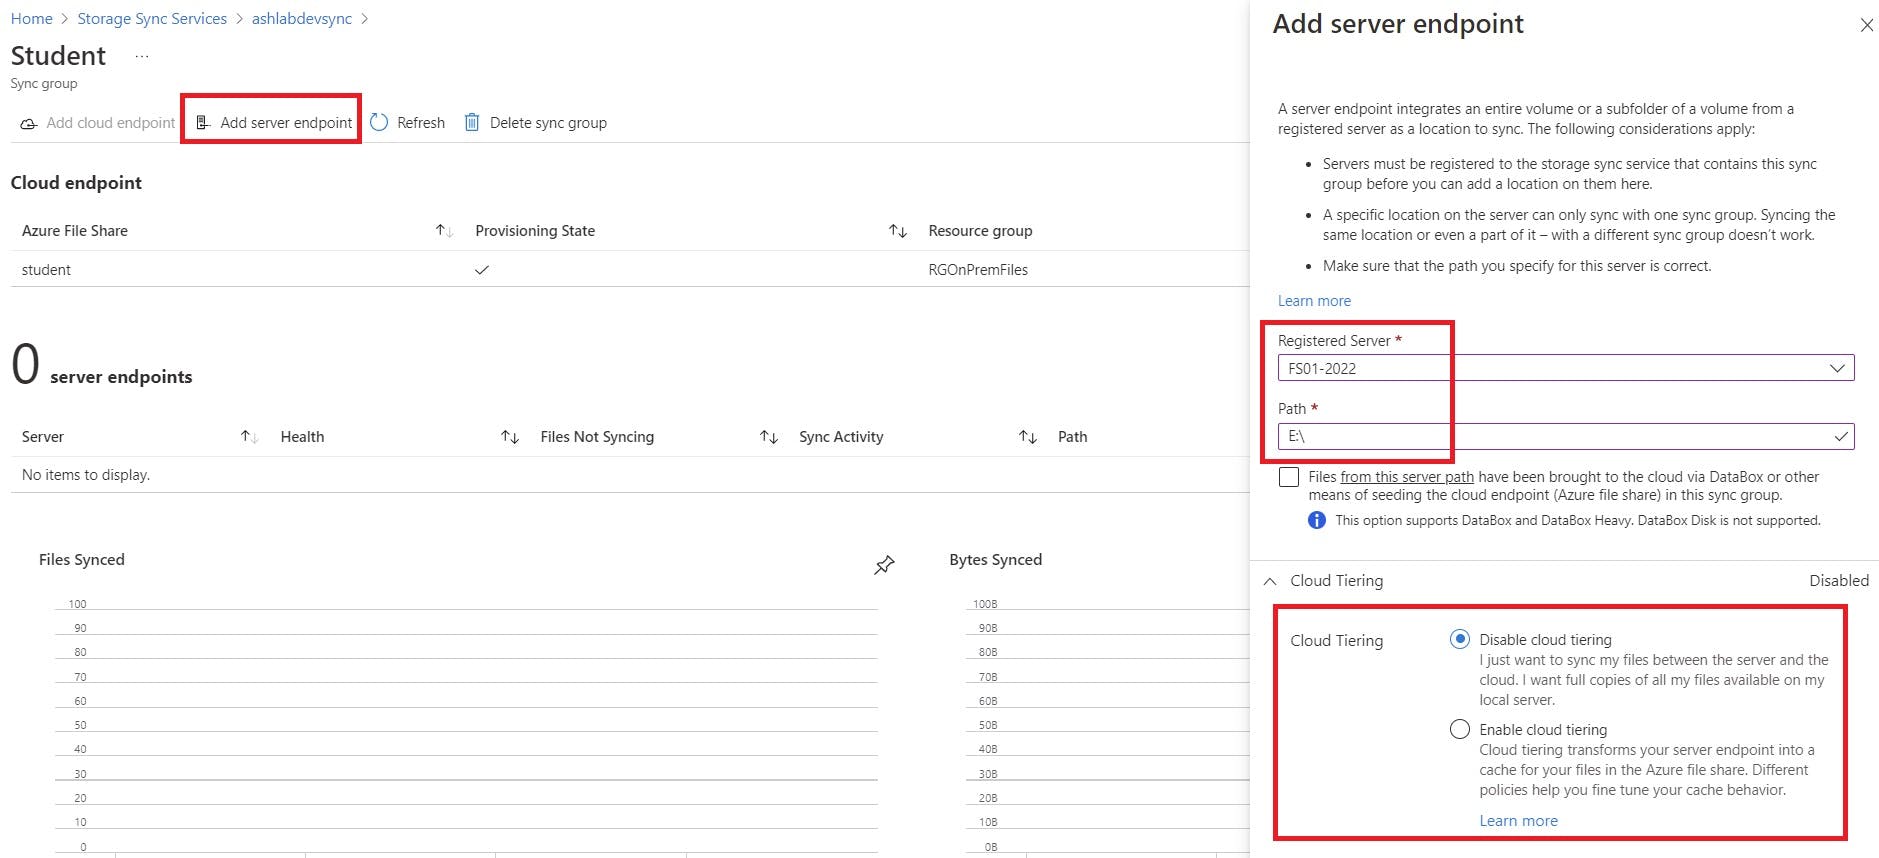
Now we have our Sync Group with our cloud endpoint we now need to create Server endpoint. Click on your SyncGroup and select "Add Server Endpoint" You will be asked to select a registered server you have enrolled with the Sync Agent then the path of the share or volume you wish to sync.
My student Volume is E:\ Drive i wish to sync the whole contents of E:\ up to Azure. you can by all means pick a folder path. My Teacher Volume is D:\ Drive.
You also get the option for cloud tiering where recently accessed files will be cached on the file server.
When all is synced you should see a green healthy tick on the server endpoint.

Testing
I have added a number of folders to the File server volumes on both Student and Teacher. These should then sync up and be available in our Azure File Share.


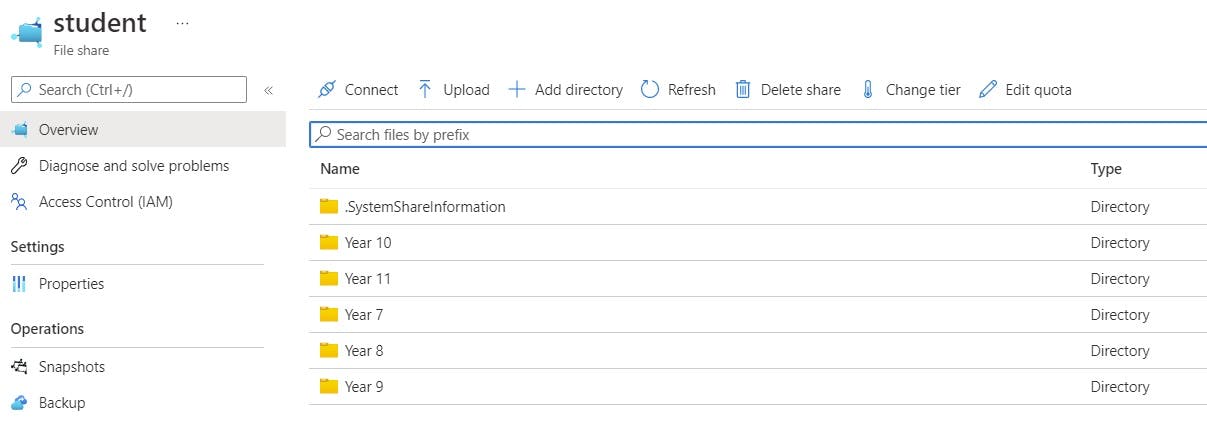
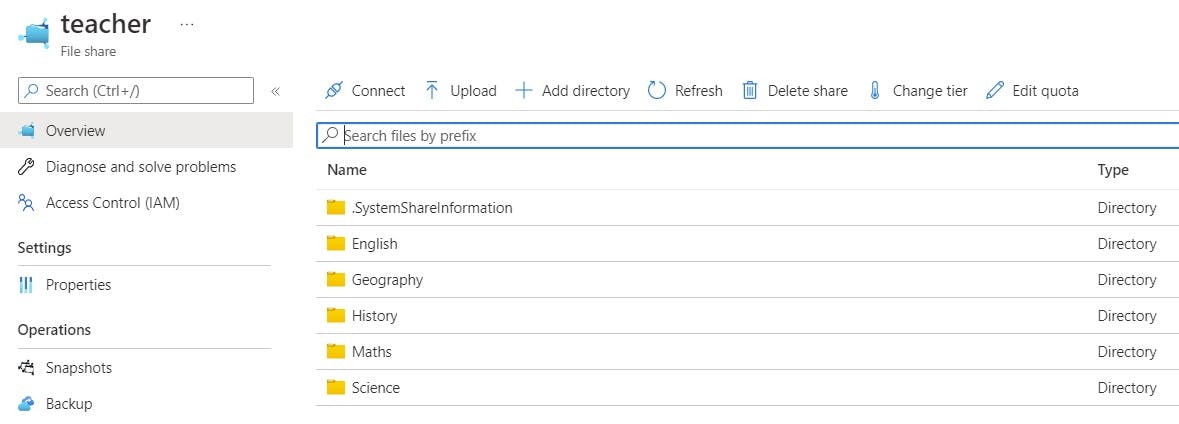
Finally I add a text document to the English folder for teachers volume:

It's also synced to Azure automatically!

Azure Backup (overview)
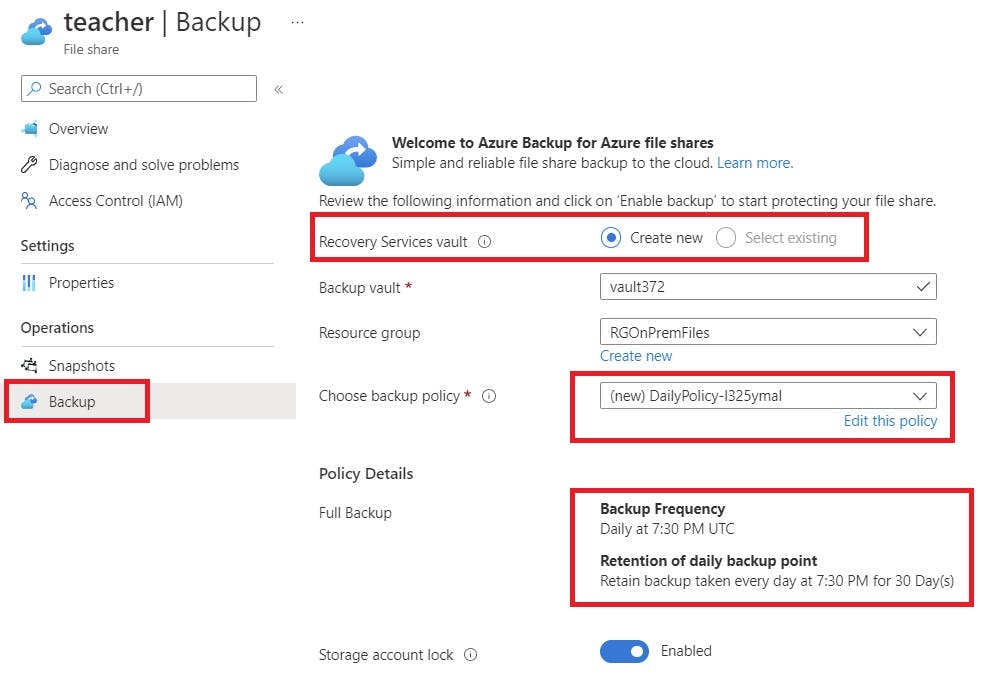
You can easily backup your files using Azure backup. You can do this from the Azure File Share by selecting Azure Backup. You will be prompted to create or provide an existing Recovery Services Vault and select a backup policy. I have left this one on default daily 7:30pm.
Once run you will be able to restore from the backup snapshot either entire volumes or selected files.
Again I will cover Azure backup features in another Lesson.
Summary
This concludes Azure File Sync. Its important to remember the cloud and on-premise components required and how they fit together to complete the Azure File Sync solution. Pay attention to the steps we have followed as you will be tested on these.
Below is Microsoft official documentation recommended order of deployment steps: REMEMBER this for the exam with the components and you can't go wrong!
